Soryu (a little blurry, sorry!) Added better side shots:
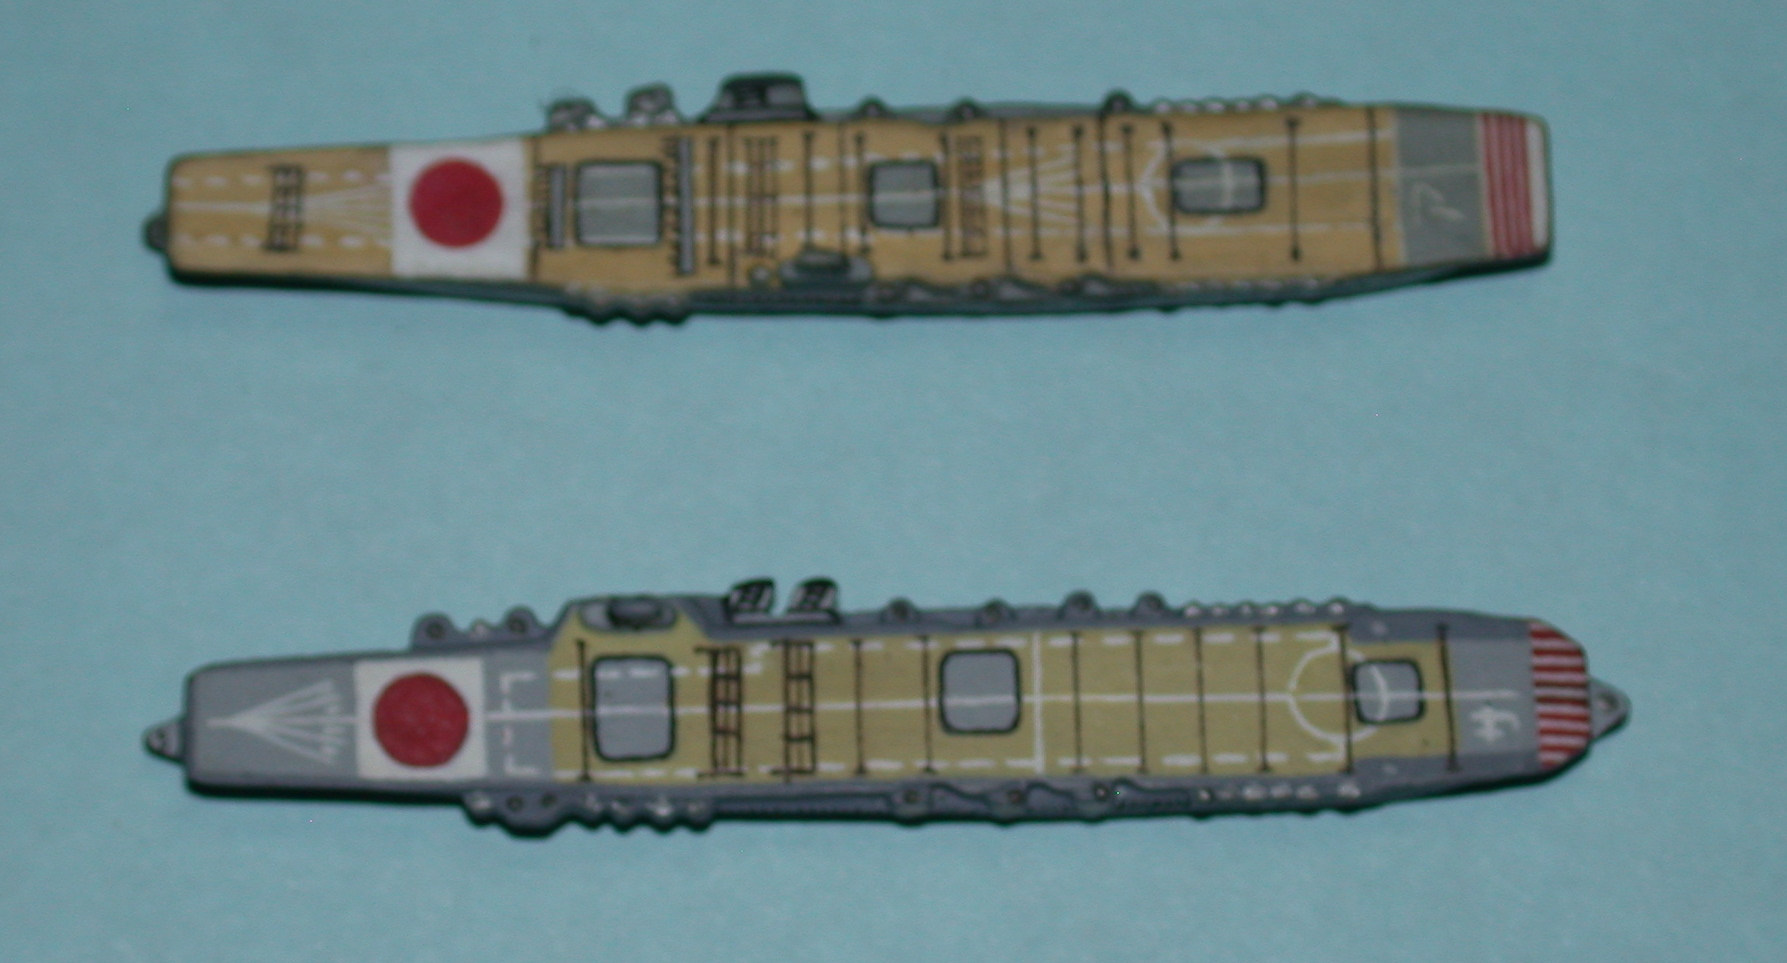

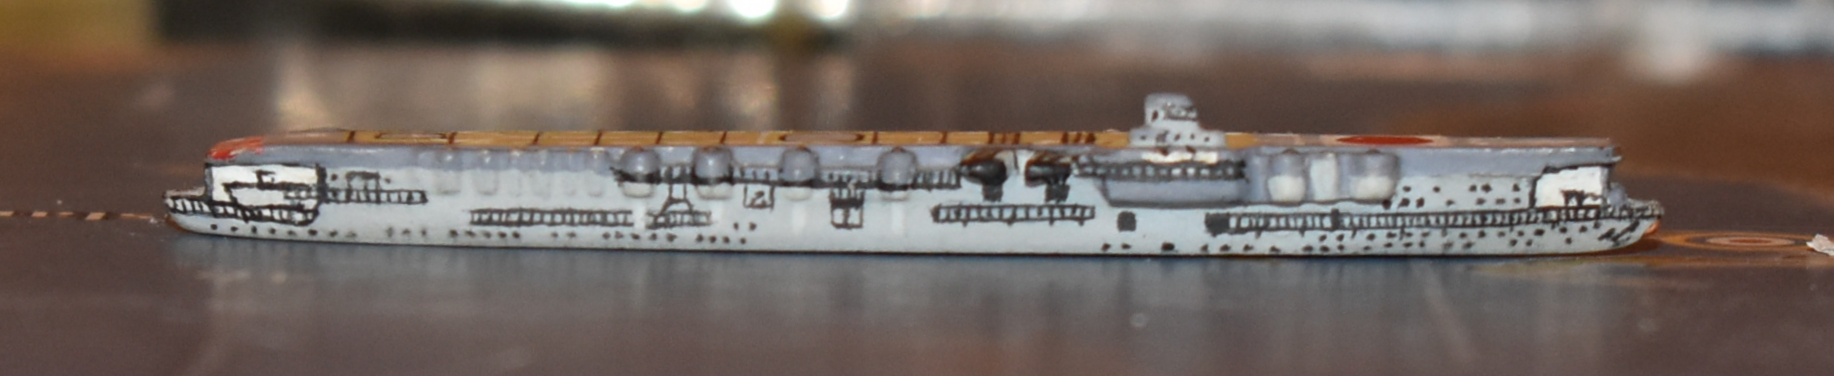
Soryu (a little blurry, sorry!) Added better side shots:
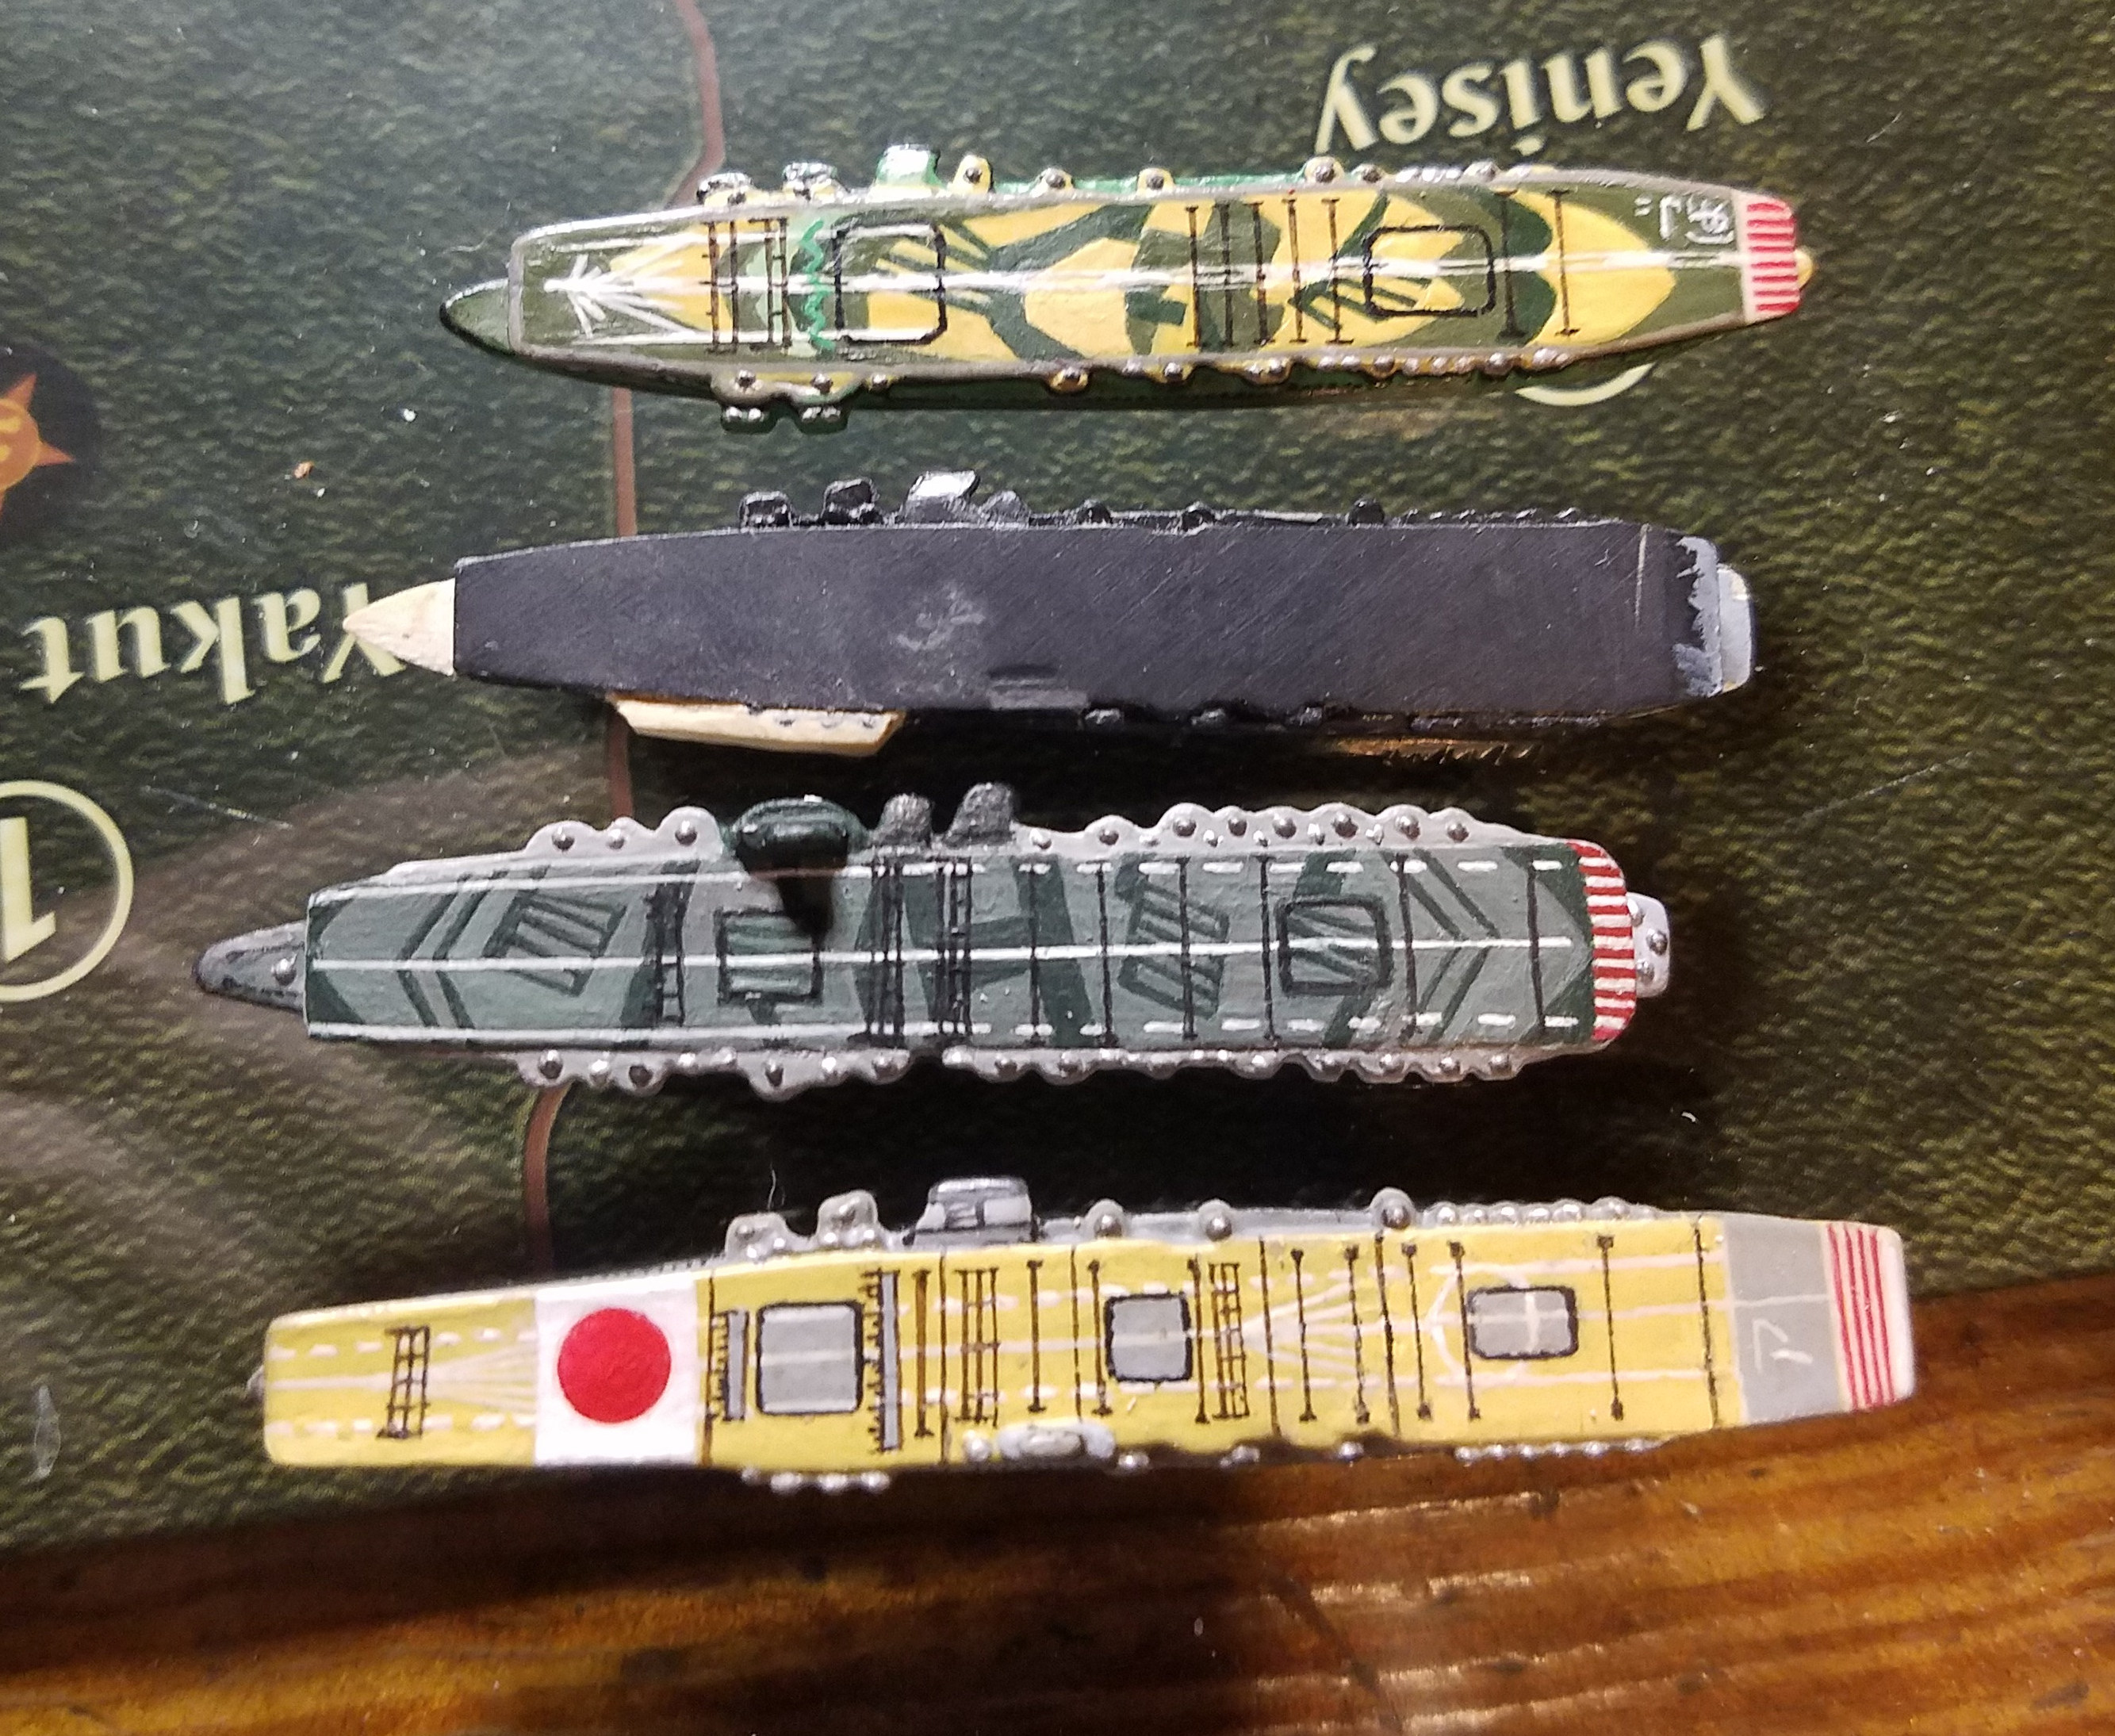
The various modded Akagi sculpts lined up with original Akagi so you can see what’s cut away from the Akagi sculpt to make a shorter light carrier- from the top: completed Zuiho, Shoho in progress with white putty before its sculpted away, 95% completed Amagi, Akagi at bottom. On the unpainted black Shoho-in-progress, you can still see where the tower was cut away. That tower was used on a OOB Shinano sculpt to make the Zuikaku in the first picture of the post. The pieces are lined up so you can see the front of the sculpt was cut off for the Zuiho, a little front and back for the Shoho, and the rear was cur off and the bow extended to better fit the ship profile on the Amagi.
Finished the last 2 Mosquitoes to make 10 for the UK. We rarely build more than that with the UK, so I’m hoping 10 will be enough. With 2 exceptions, they’re all painted to resemble aircraft that really flew. The desert camo isn’t historically accurate and carries my initials.

@Quirky-Turtle: Great video! The printed map looks fantastic. I’m curious though- what do the Litko Flaming Wreckage and Splash Markers indicate on the printed map, and the large green chess pawn looking things on the oob board represent?
Thank you, gentlemen. We’ve enjoyed seeing your work as well.
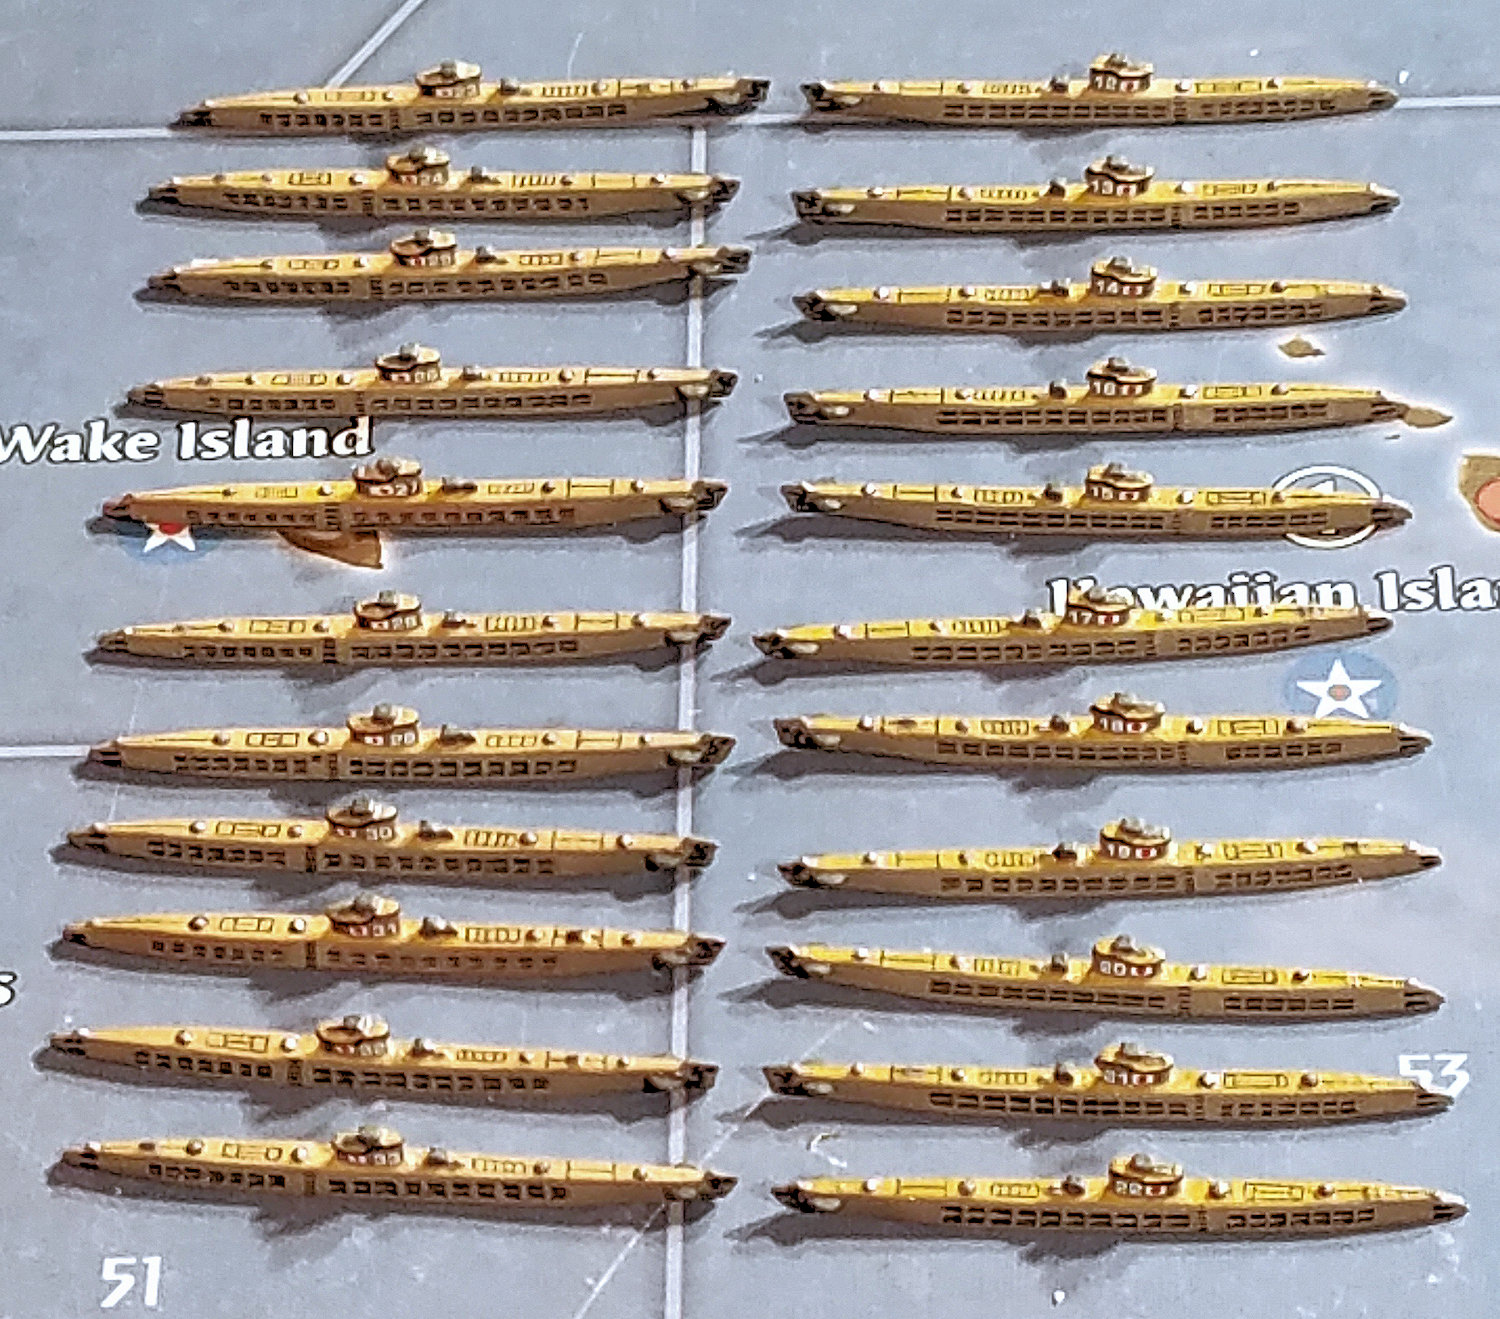
FJO and I are collaborating on the Japanese subs- he’s painting and I’m adding decals. He’s on the forums here now as “folewnik”, so I’ll just call him FO. (no snickering.) The first batch pictured here we’re using as super subs- the “I” class. I couldn’t find Japanese flags small enough to fit on the conning tower, so FO tried painting white squares on some, and I used slices of the white stripes from the l-94 Italian aircraft markings sheet for white squares and added the red dots from the l-94 US roundels sheet to all of them to make the flags. The numbers aren’t where they should be, but we wanted them to stand out on the super subs a little more than the standard subs (which are almost done) and went with the larger numbers on the hull rather than the smaller numbers on the conning tower. These are the mid size numbers from the l-94 white letters and numbers sheet. FO did the deck detail in brown pen and the hull details in black pen from a schematic we found online. 


Thanks, Sarge, I’ll pass that along to FOlewnik. I wanted to find the schematic he used as a guide but Google wasn’t giving it to me. Shame, too, since I feel this is another one that he nailed. I do have the schematics for the Taiyo and Shinano and will post them when I post the pictures.
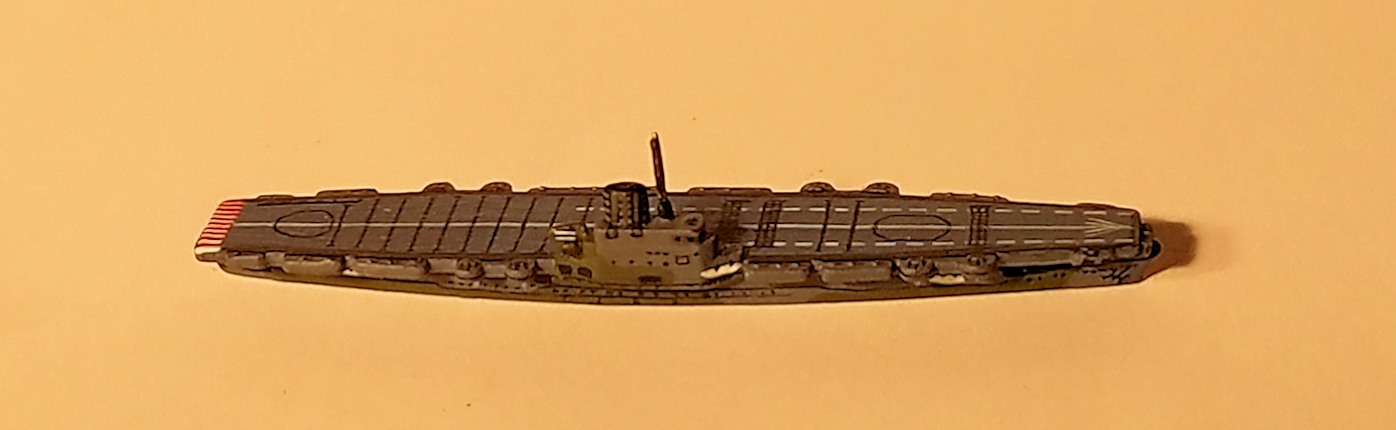
When FOlewnik was researching the Taiho & Shinano, he noticed that the sculpt is much closer to the Taiho in it’s layout than it is the Shinano. He worked on both pretty much at the same time and they seemed to me to get done pretty quick. Once again our lighting was poor for a lot of the shots, but I tried to lighten them up with photoshop. It helped bring out the detail at the expense of some true color, so thankfully there’s one good shot with good light so you can see the true colors of the IJN Taiho. Most of the schematics showed the ship with a grey deck, but I’m including one with a tan color deck for the detail.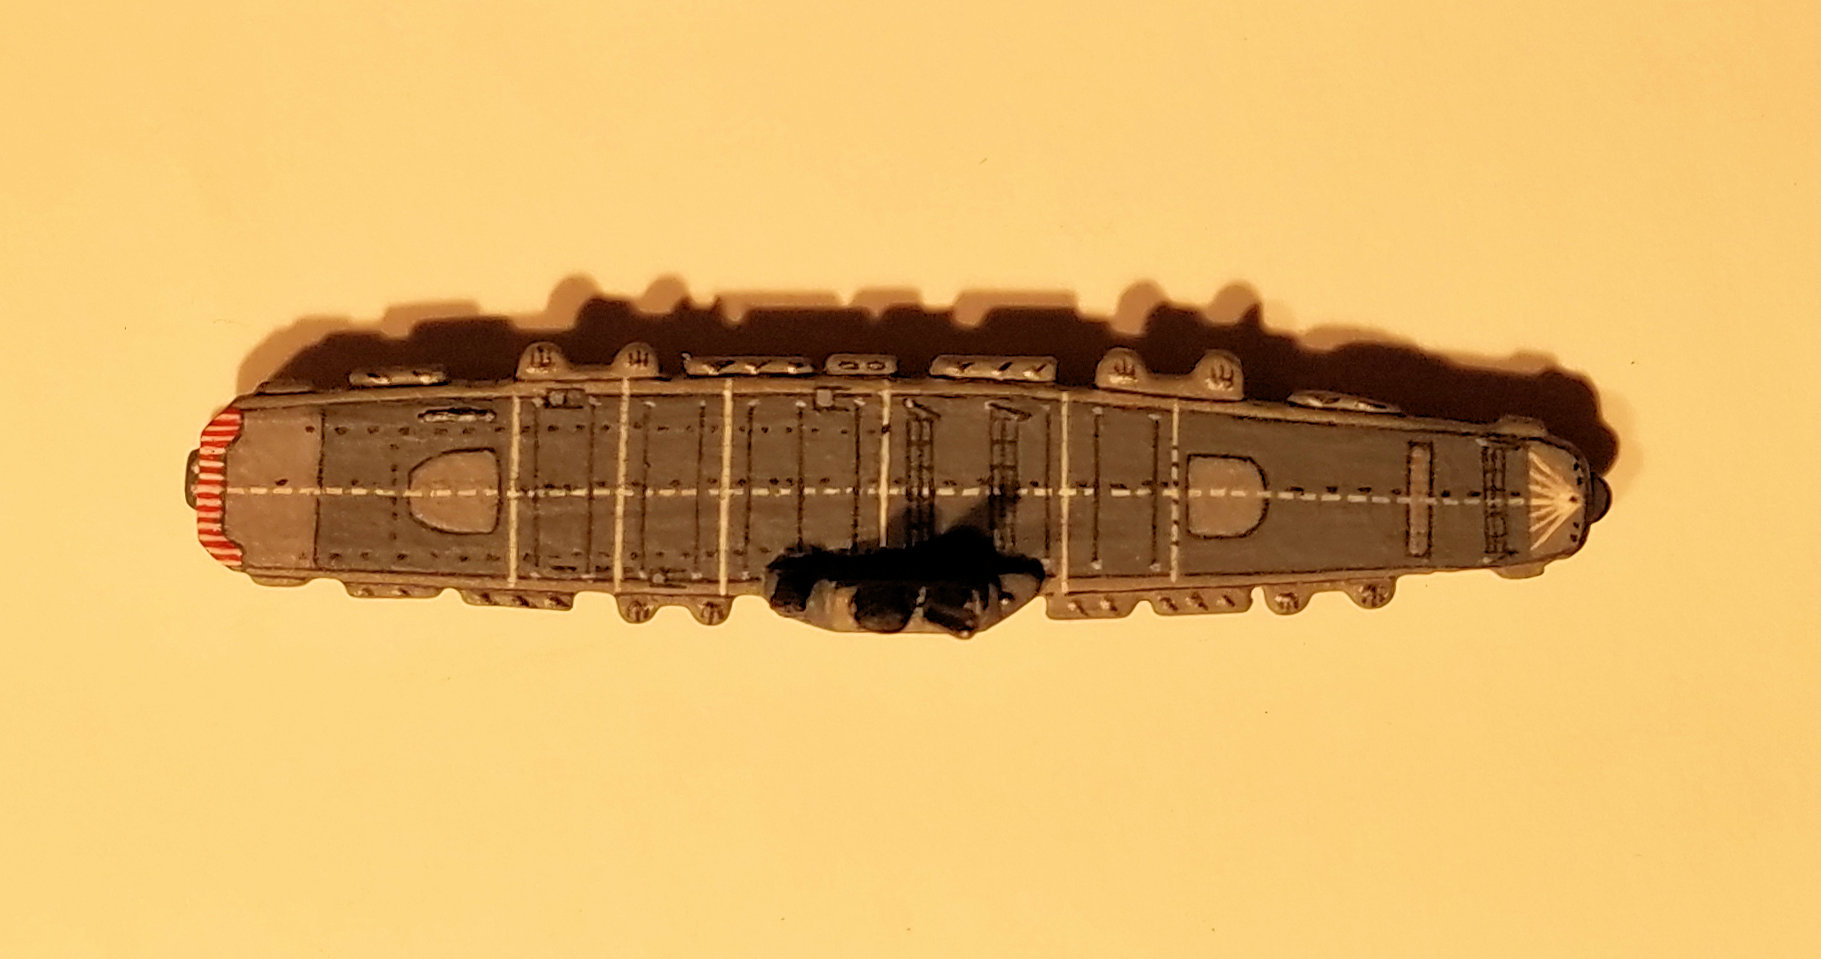


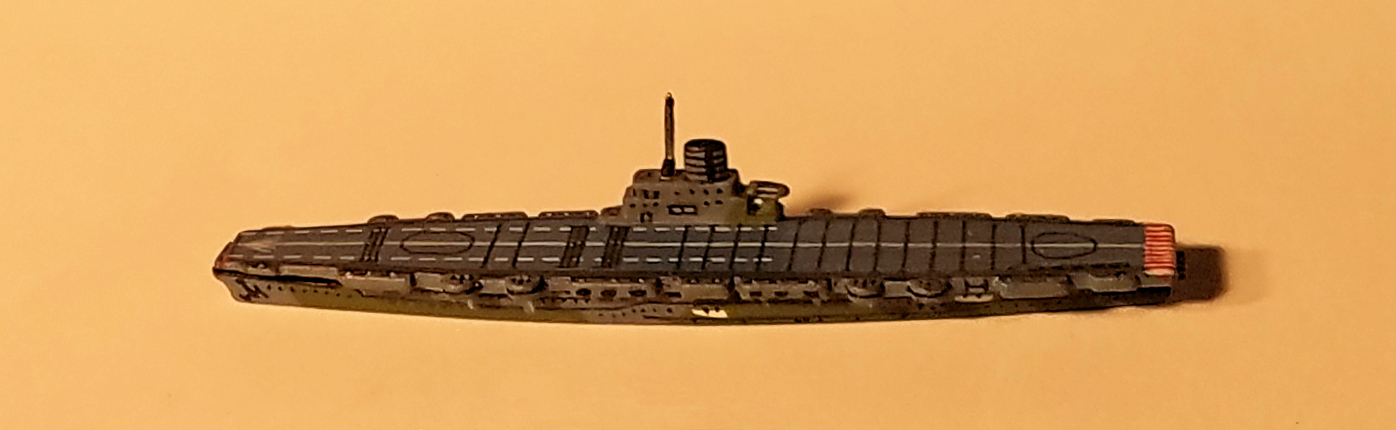
The IJN Shinano hull required some heavy and tricky cutting away under the front of the flight deck, and a little at the back, to look like the IJN Shinano from the side view. FOlewnik cut those away and added a few other small details to round out the final look. He went with a grey base hull to make the camo silhouette stand out better than what the schematic shows. Once again plagued by bad lighting (all the recent posts were shot at the same time with that bad light) but one good picture shows the true colors.


Finally got pictures of the Japanese starting subs (previous Japanese sub pics are super subs). We’re using the Kaichu subs from the 1941 set, with extras purchased from HBG. FOlewnik did the paint & I did the decals. I’d be happier if the pictures were a little sharper but you can still see the detail on the piece. Needless to say, the 20/0 and smaller brushes got a workout on the flanks of these pieces. It took a very steady hand to keep the lines straight on the ballast ports- if one was even just a little off it stuck out like the proverbial sore thumb. I made the flags from the white stripes on the Italian roundel decal sheet and the red dots from the US early roundel decal sheet like on the super subs posted earlier (the I series from the Pacific set). The numbers on the conning tower are from the I-94 white numbers & letters decal sheet.


Agreed- #3 Heavy looks best. That one has a few landings to his credit, from the looks of him.
We’re still in the process of making storage. FO got hold of an old metal card file cabinet section that’s about 18x36 inches with either 24 or 28 drawers (6 or 7 columns of 4 drawers) that are slightly wider and twice as deep as the piece storage box that comes with the game, and a little over twice as long. He’s also got some foam sheets we’ll eventually cut for them so each piece sits in its own little cut out. The only thing he’s had to worry about are the little planes on the pieces with launch catapults. Two or three weren’t glued in solid enough and have come off. The rest are pretty solid- enough so that you can pick up the piece by the little aircraft sitting on the launch catapult.
@Phelan-Kell - you BET I can’t wait to bring some detailed SBD’s in on these and toss a handfull of dice in the box against them! We had a pretty kick-arse game of “Check Your 6!” with the aircraft last Thanksgiving. I put a few pictures in the “Other Axis & Allies Variants” section.
Yes, our group has, and you missed the HBG JU-87G Stuka tank killer. http://www.historicalboardgaming.com/Battle-Pieces--German-Exp--Tactical-Bomber-x5_p_2175.html Put that one on your list- it’s a great looking piece we add with advanced artillery.
One thing to remember is that the HBG expansions are for their Global War (GW) game & rules. GW uses 12 sided dice and a different technology chart, with some easier to roll than others (if I recall). Adapting the special rules in most cases is just a matter of dividing the 12 sided roll by 2 for A&A. But in the Going Nuke scenario the “4 turns of successful tech rolls” equates to paying 2 IPC’s per turn in the Global War game to advance your tech marker along the development line for 4 turns. In GW, you either take your roll for tech to see if you advance the tech marker, or pay 2 IPC’s to advance your marker. So in A&A you could just pay the 2 IPC’s every turn, or whatever your group decides for balance.
There is also a house rules section here that’s worth checking out if you haven’t been there yet, as well as the Global War section.
Our group uses most of the HBG pieces for A&A tech, to differentiate pieces on the board from those with technology and those without (long range vs. regular aircraft, for example). And we’ve added pieces not on the roster but available from HBG, like light tanks and light cruisers. If you’re a piece junkie and you haven’t bought the game yet, check out HBG’s “Amerkia”- it has some excellent pieces and the price has really come down (and it’s also a fun game).
I’ve read the rules on the Atlantis scenario, and agree it looks like it would be fun to try, but on the GW 1939 map. In my opinion, it would be difficult to do on the G40 board because of the smaller number of sea zones. You could probably tweek it a bit to make it work, though. And it would make for a neat twist on a G40 game if it could work.
So… have you thought about painting your pieces yet?
Not carriers but I posted a picture of the Takaos a few pages back in an older post (to compare over time) that need a rest and refit to replace their scout planes.
Nice! I like those aircraft stands, too. You could play “Check Your 6!” with those stands.
LOVE those biplanes!!! They look awesome! The game in progress shots give a great view of both the map and the pieces. I don’t know what you paid for that map, but it was worth every penny! Is that a GHQ transport I see in P-50?
These are great. Laughed at reason 11 on the video- good one!
Using the day off to add decals to the Kingfisher scout planes FOlewnik added to a few of the ships. These just got a few drops of Microsol and will go back to FOlewnik to get touched up and look more rounded before another coat of clear is applied. Each is a little smaller than 1mm.

Wearing camouflage measure Design 3d in the Measure 31-32-33 series, light cruiser USS Detroit (CL-8), heavy cruiser USS Baltimore (CA-68) and battleship USS Missouri (BB-63) circa April, 1944, by FOlewnik.


No matter what version of the game you own, the US Navy has only ever had the one sculpt for its cruiser. The Portland class. Granted, its probably the most known because of the USS Indianapolis, but only two of the class were ever built. They were preceded by the Northampton (6 built) and Pensacola (2 built) classes, and succeeded by the New Orleans class (7 built). These two sculpts got antennae & radar upgrades, and the center section has been cut away to make room for scout planes. Both are painted as two versions of the Indianapolis (pictures for comparison are from navsource.org-they’re HUGE!), but since the USS Portland (CA-33) also wore the dazzle camo pattern, we’re using the one on the left, with the dazzle camo, as the USS Portland. The one on the right is painted as the USS Indianapolis (CA-35) was painted on her final voyage. She also received a different set of launch catapults for her scout planes.


Here are two larger pictures to show the detail of the center cut away before the scout aircraft are glued into place. First Portland with lower added launch catapults, then Indianapolis with the higher added launch catapults.


The USS Indianapolis get its scout aircraft glued into place prior to adding decals. This makes it easier to apply the tiny, tiny stars to the scout’s wing, as it will have a larger, more steady base while attempting to apply a ridiculously small decal decal to the wing.

After applying the hull number first and giving it liberal coats of Microsol, I added the stars to the wings of the scout planes. You’ll notice one of the aircraft has 2 stars- this is to make sure that a good star is in the proper place on the wing and still have enough decal sheet for me to hold on to with the tweezers while I’m soaking it and applying it. That double star is a little less than a millimeter wide and almost 2mm long. After a little bit of Microsol on each, being very careful not to move the decal while applying a drop as large as the decal is, it dries before I give up the chair to FOlewnik for touch up paint, making each as round as possible and covering the extra star. To the right of the Indy is a cruiser sculpt in preparation to become a New Orleans class cruiser.

Finally, the touch up paint makes the wing roundels actually round, giving the ship its finished appearance.

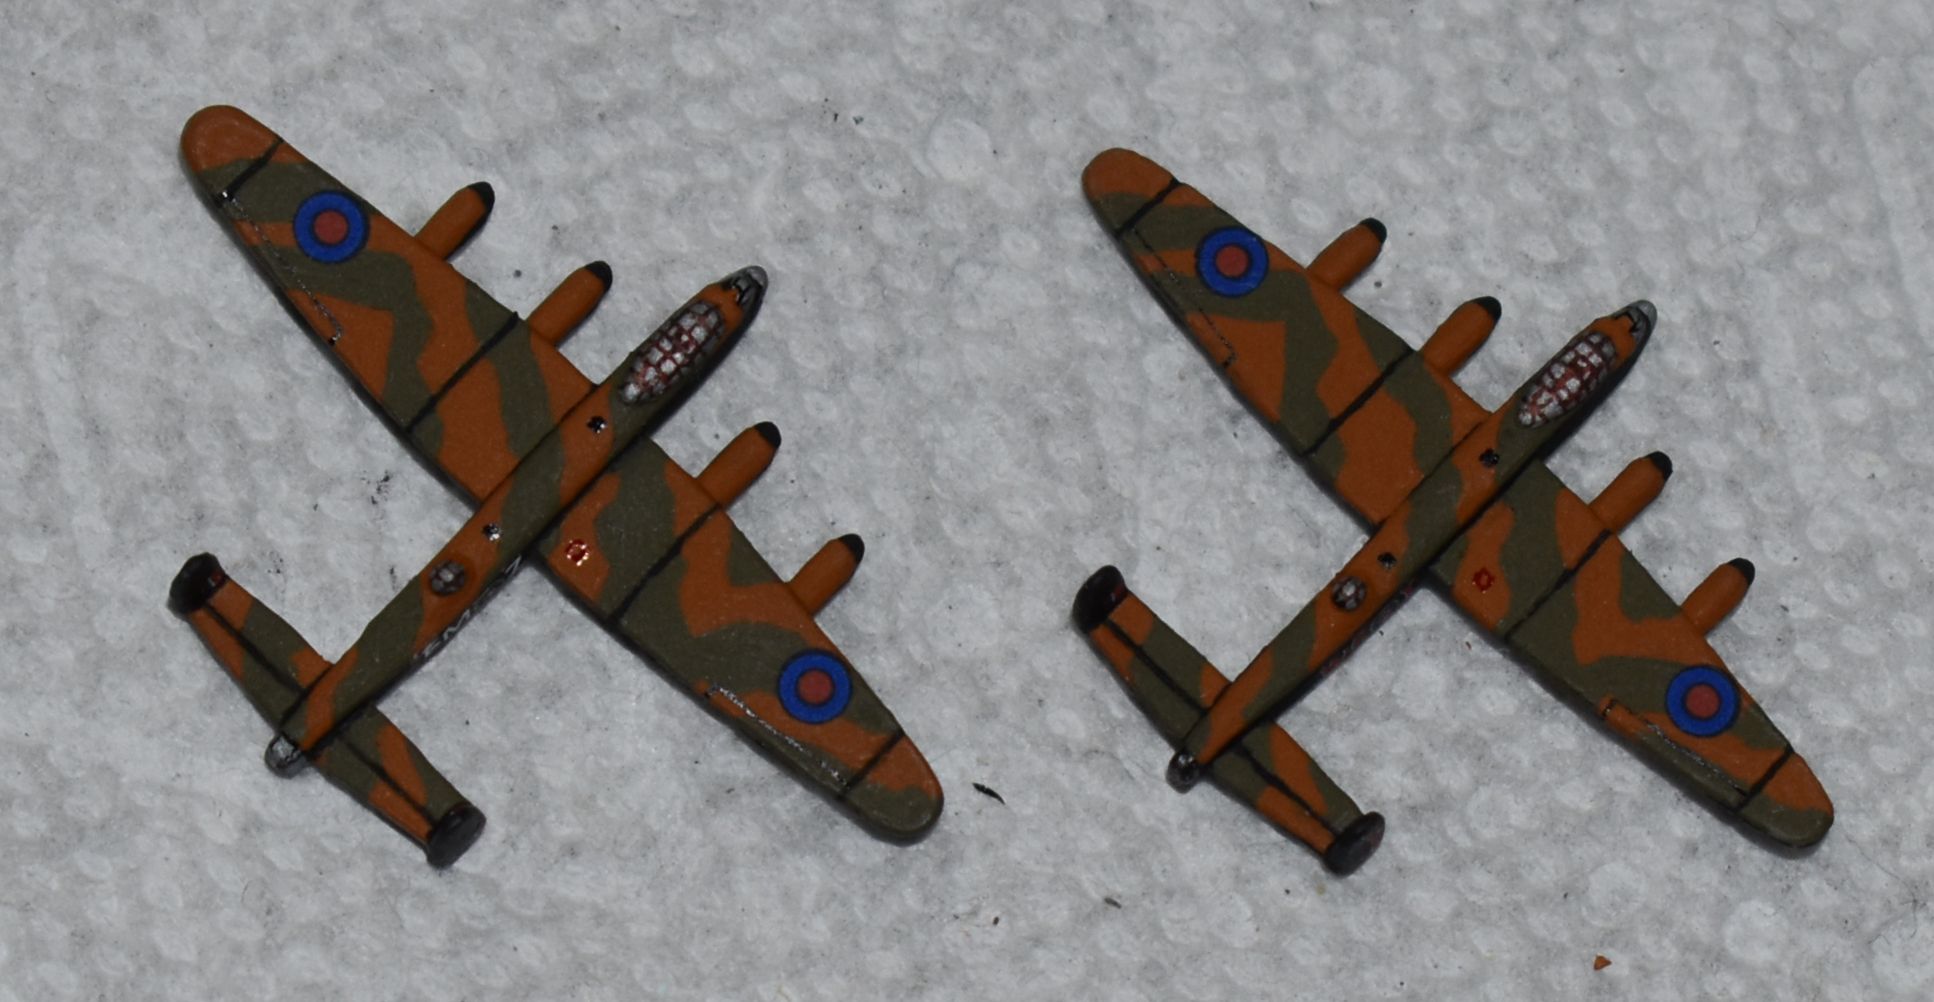
Taking a brief break from FOlewnik’s ships to show the four Lancasters I finally finished for the UK. FOlewnik’s nephew owns the copy of the 1941 A&A set and has the rest of the Lancs so these were the only 4 we have. I’ll have to get at least one more from HBG. I’m doing some Halifax bombers as well, but they’re far from done. On these sculpts, the rear rudder is rather square and it should be a sort of tear drop shape, so each had to be filed to the correct roundness before painting. I wanted to ink the cockpit glass and top turret in brown and the nose and tail guns and bombardier window in black, so it was a several day process once the pieces were painted and decals were applied. The black separation line at the edge of the camouflage was extremely difficult to make straight on a piece that isn’t really straight to begin with and took a long time to get satisfactory. But once the piece was painted, I brushed some dulcote on the silver paint so the ink pen would take, then applied decals (14 per aircraft). The dulcote gives the ink something to adhere to, as it wouldn’t adhere nor dry on the gloss silver paint. From handling the piece during painting, I knew the ink process would take a few days, as each inked section would have to dry before the piece could be handled to apply the next. The pilot’s cockpit was done first- there are some windows molded in, but not nearly all, and not really all that correct, but close enough to make work. Then the pieces had to dry for 24 hours, and then the top turret was done and the pieces set aside for another day. The next day was the tail gunner in black, then the nose turret and bombardier window the day after. Then the whole piece (all 4) gets a shot of dulcote spray and dries for yet another day (just to be safe- it was pretty humid) before final inking. The first picture below shows the wet ink of the last applications- top fuselage light holes, wing flaps, and the little red square on the starboard wing. The rest are the finished bombers. Squadron markings were taken from illustrations on Wings Palette (http://wp.scn.ru/en). The dark circles on the wing roundels only show up under a photo flash- the decal looks good under normal light but its more difficult to get a good picture without a flash.