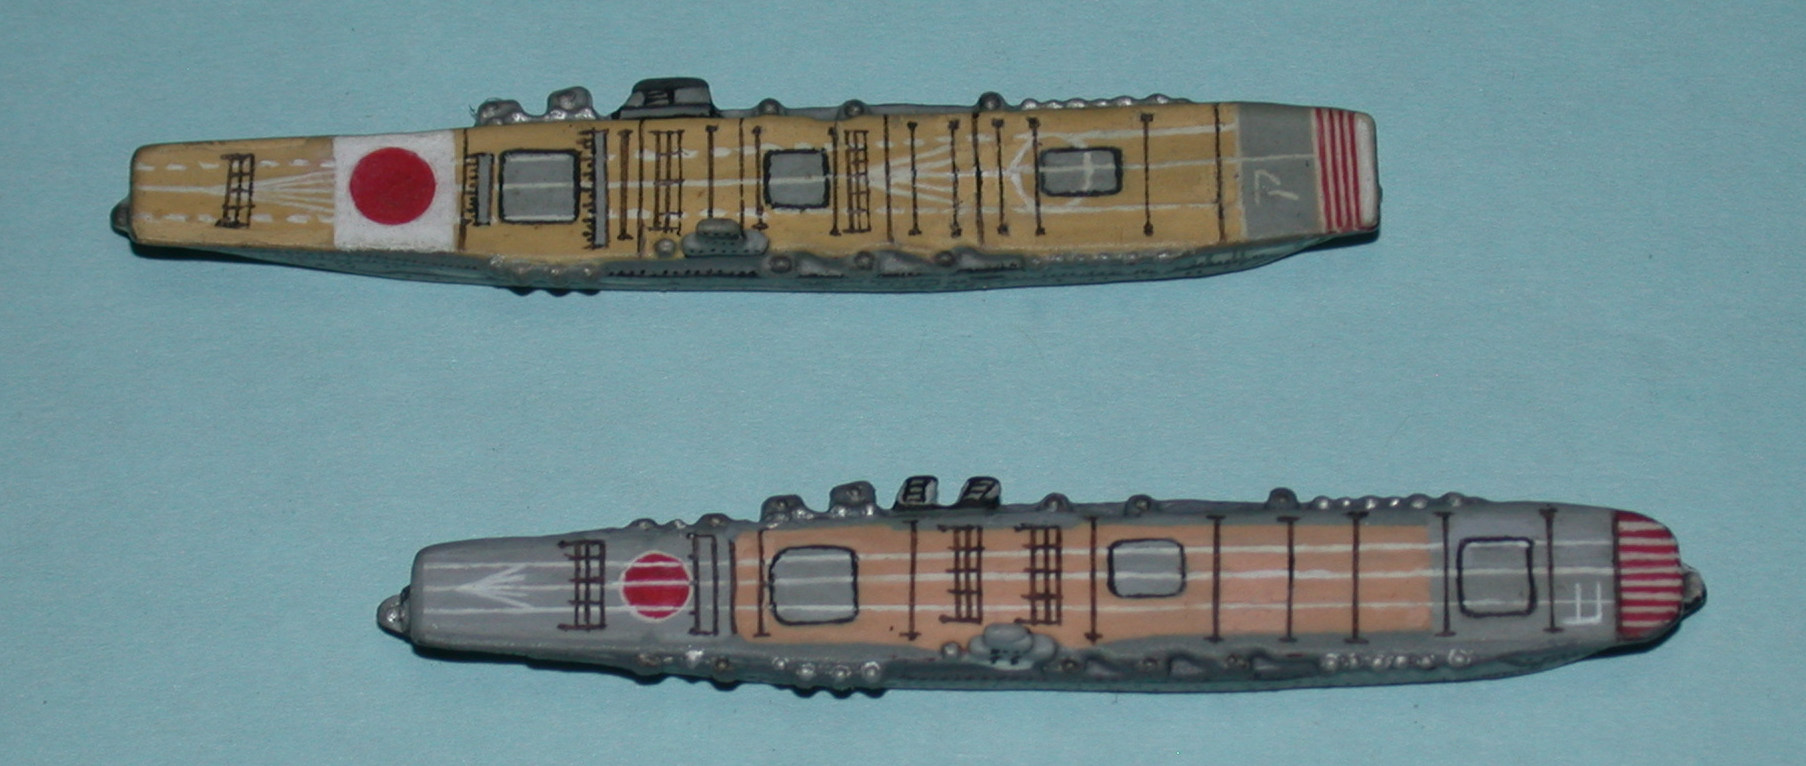
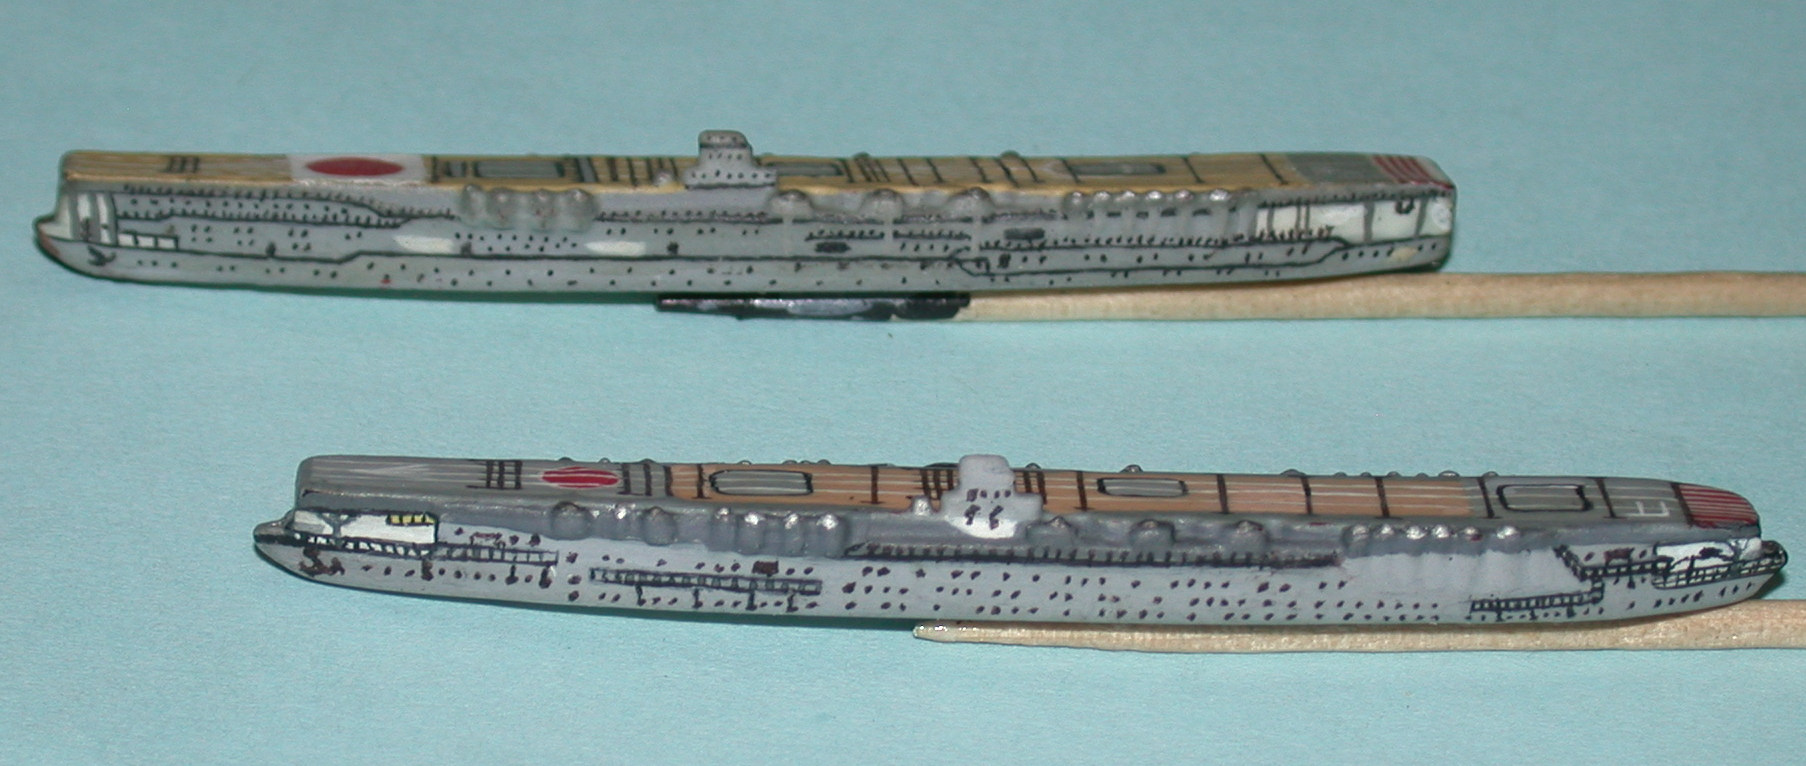
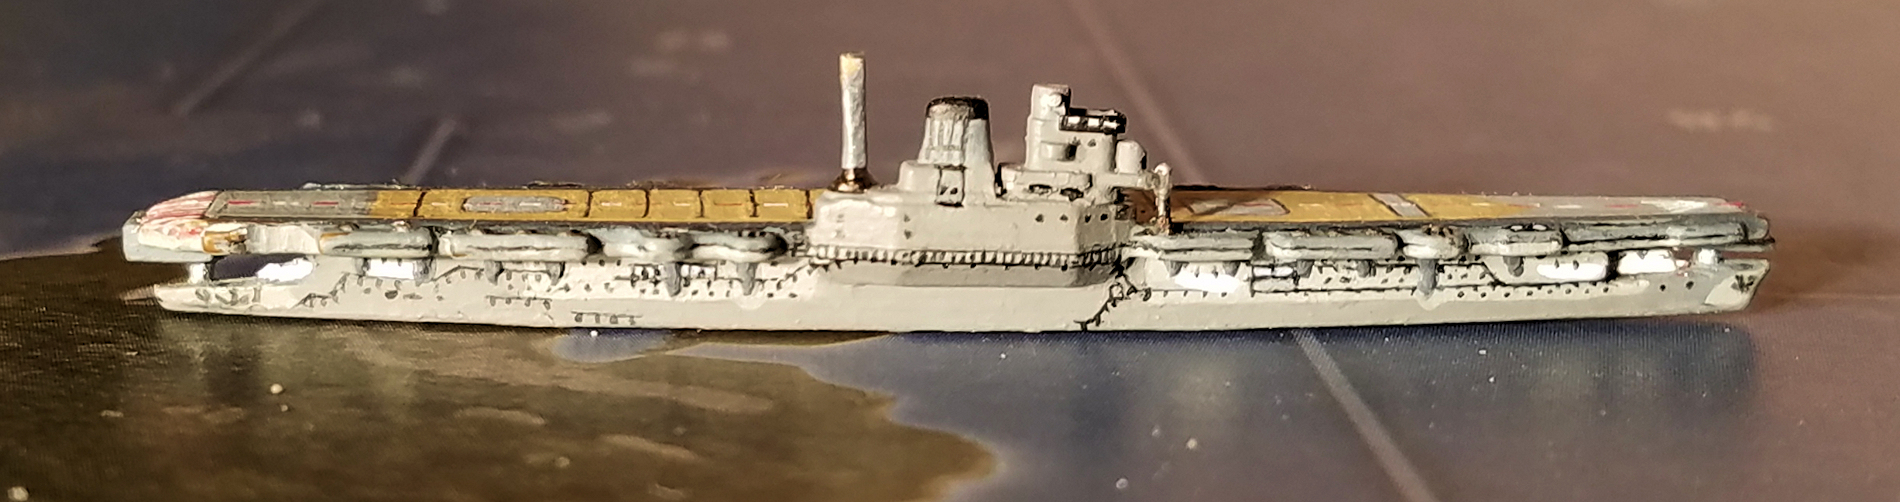
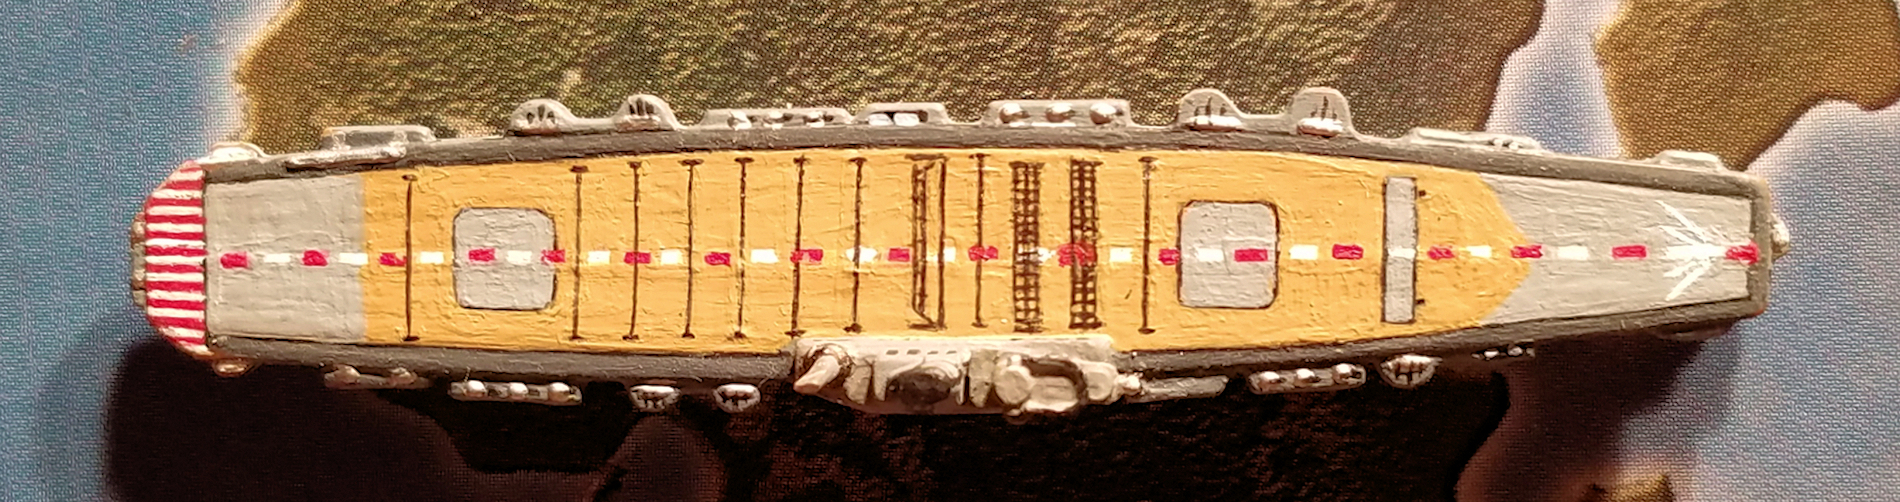
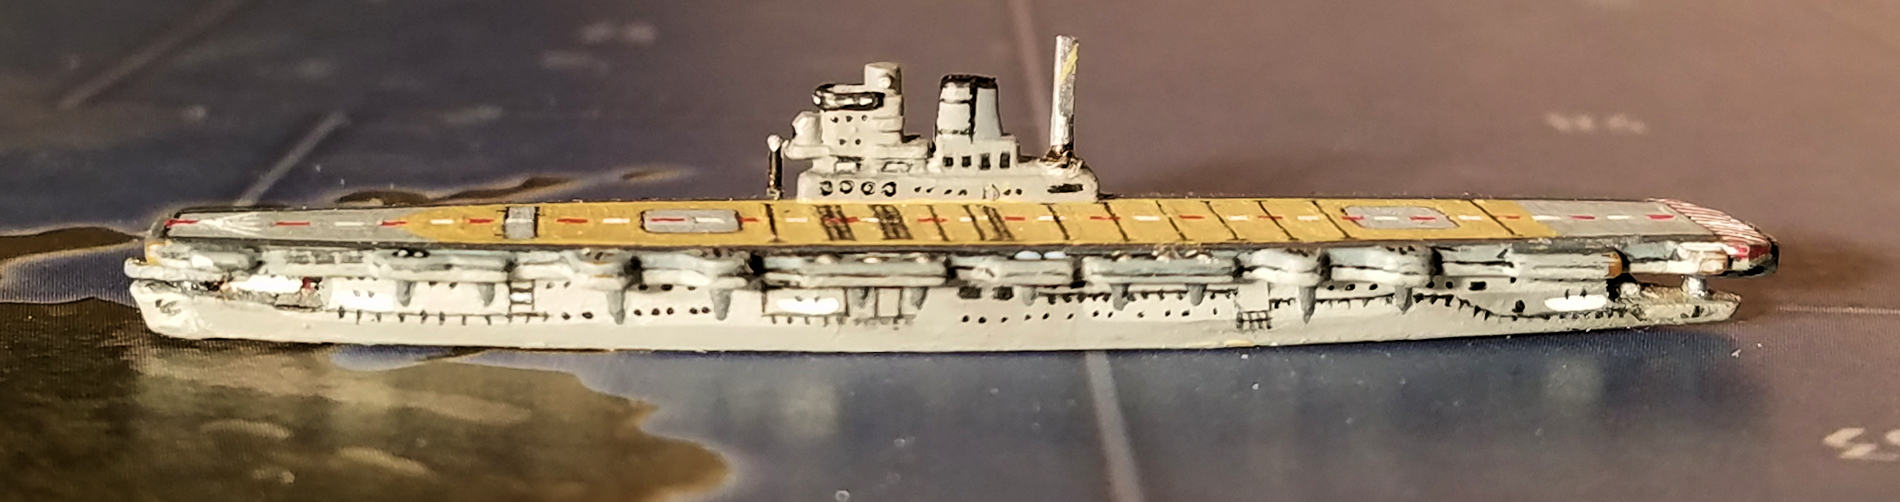
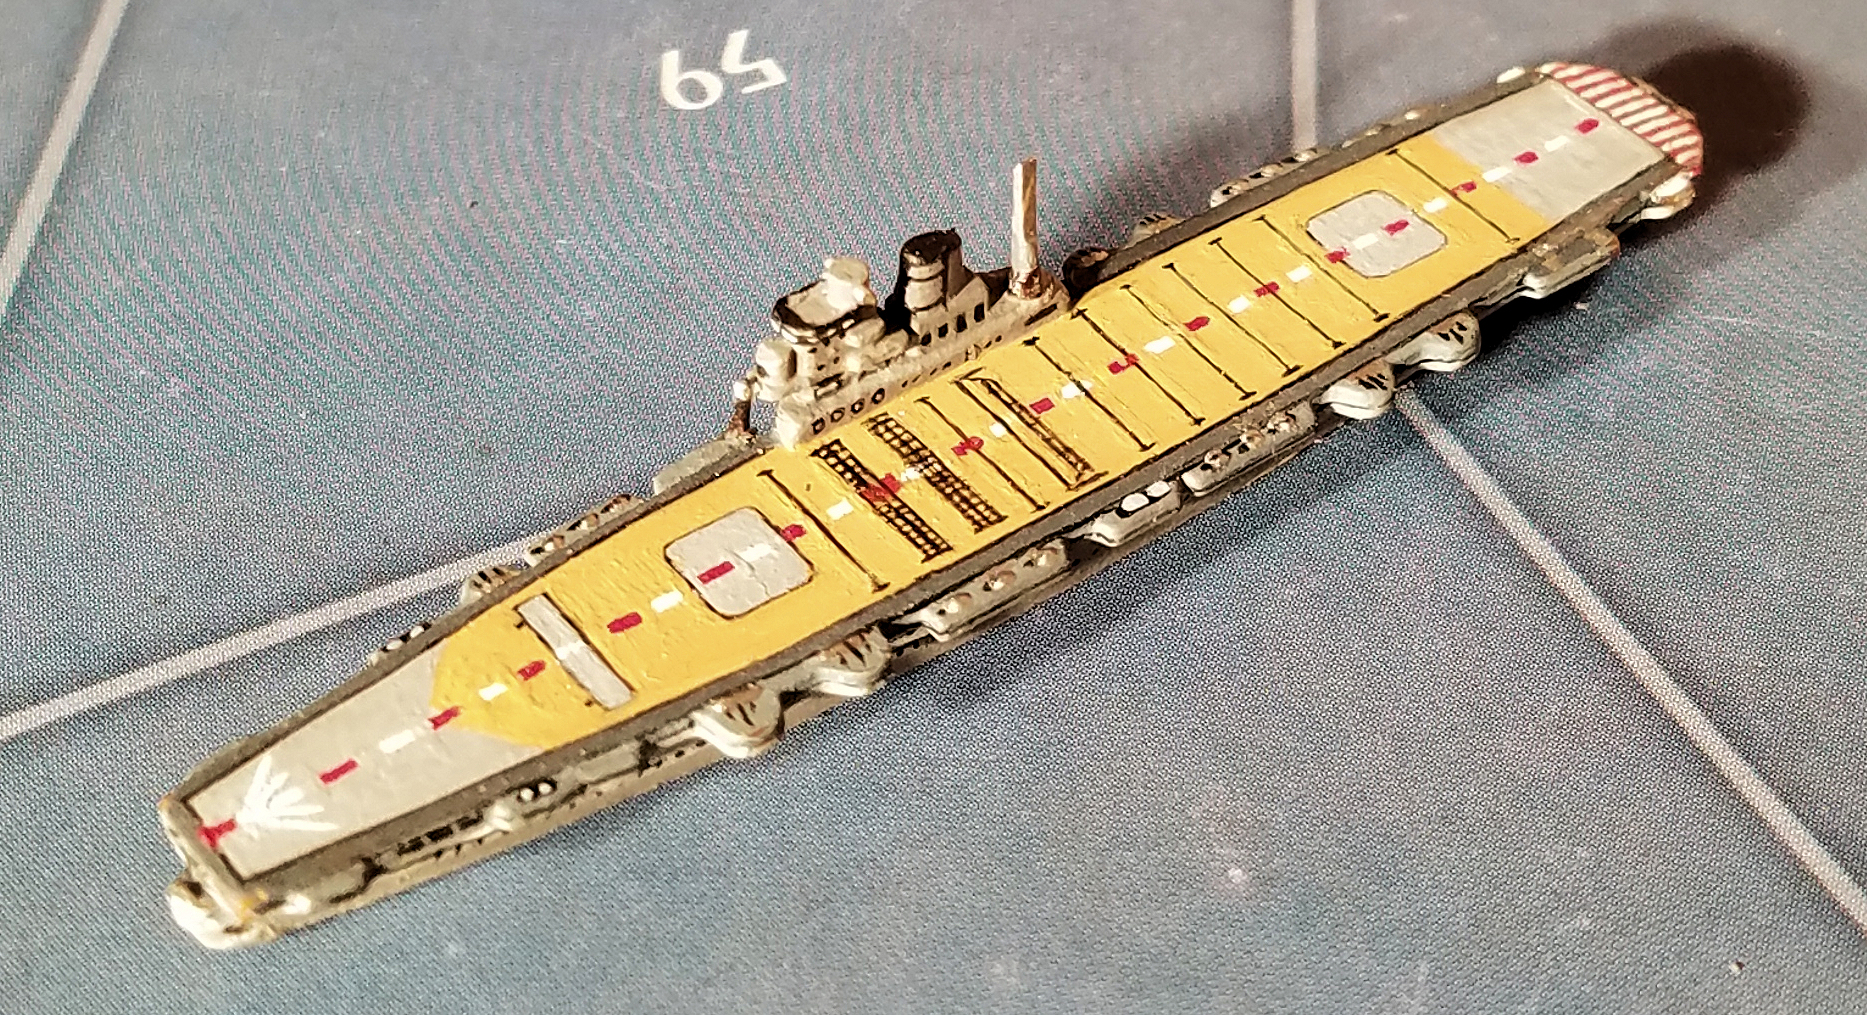
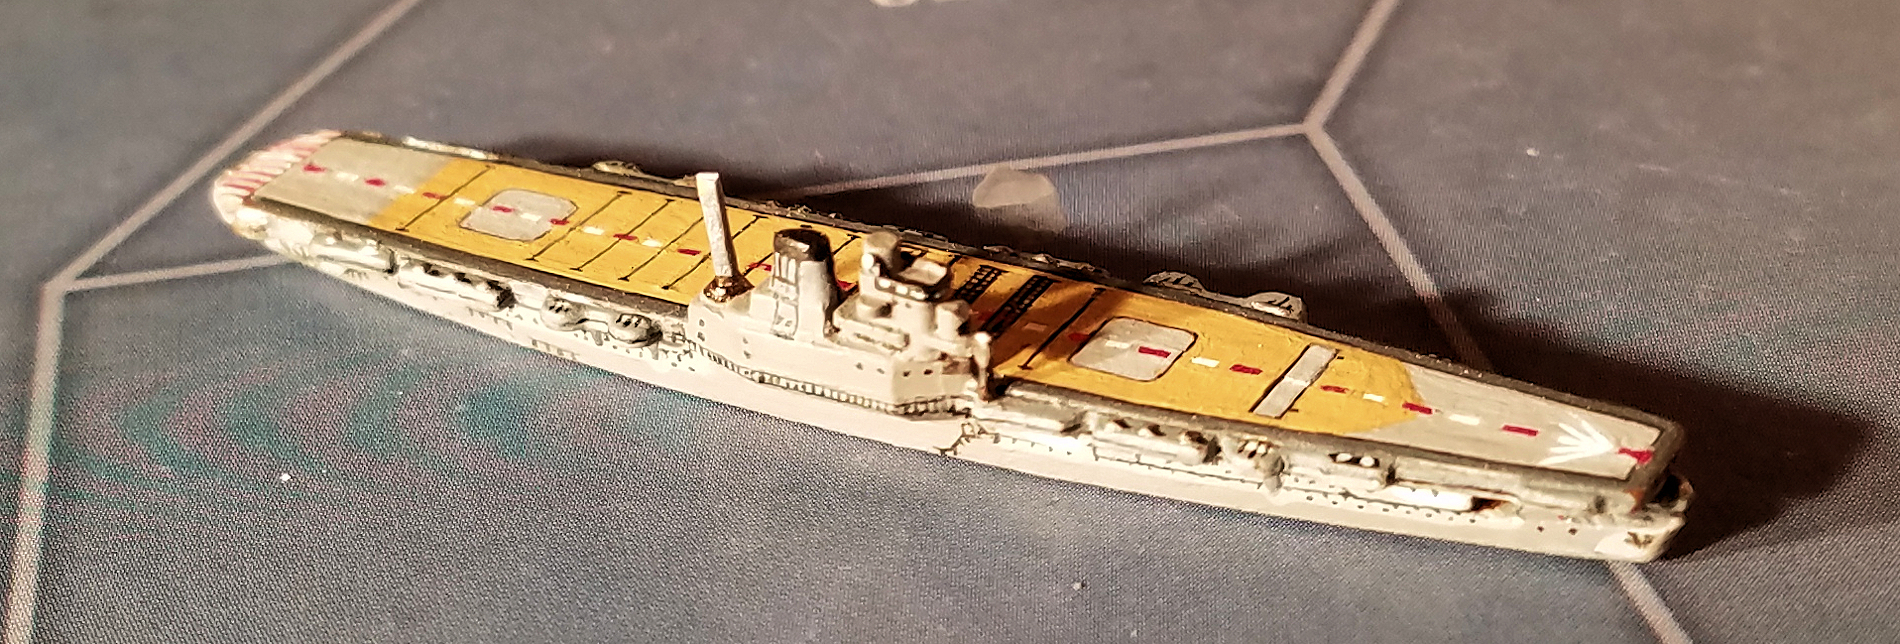
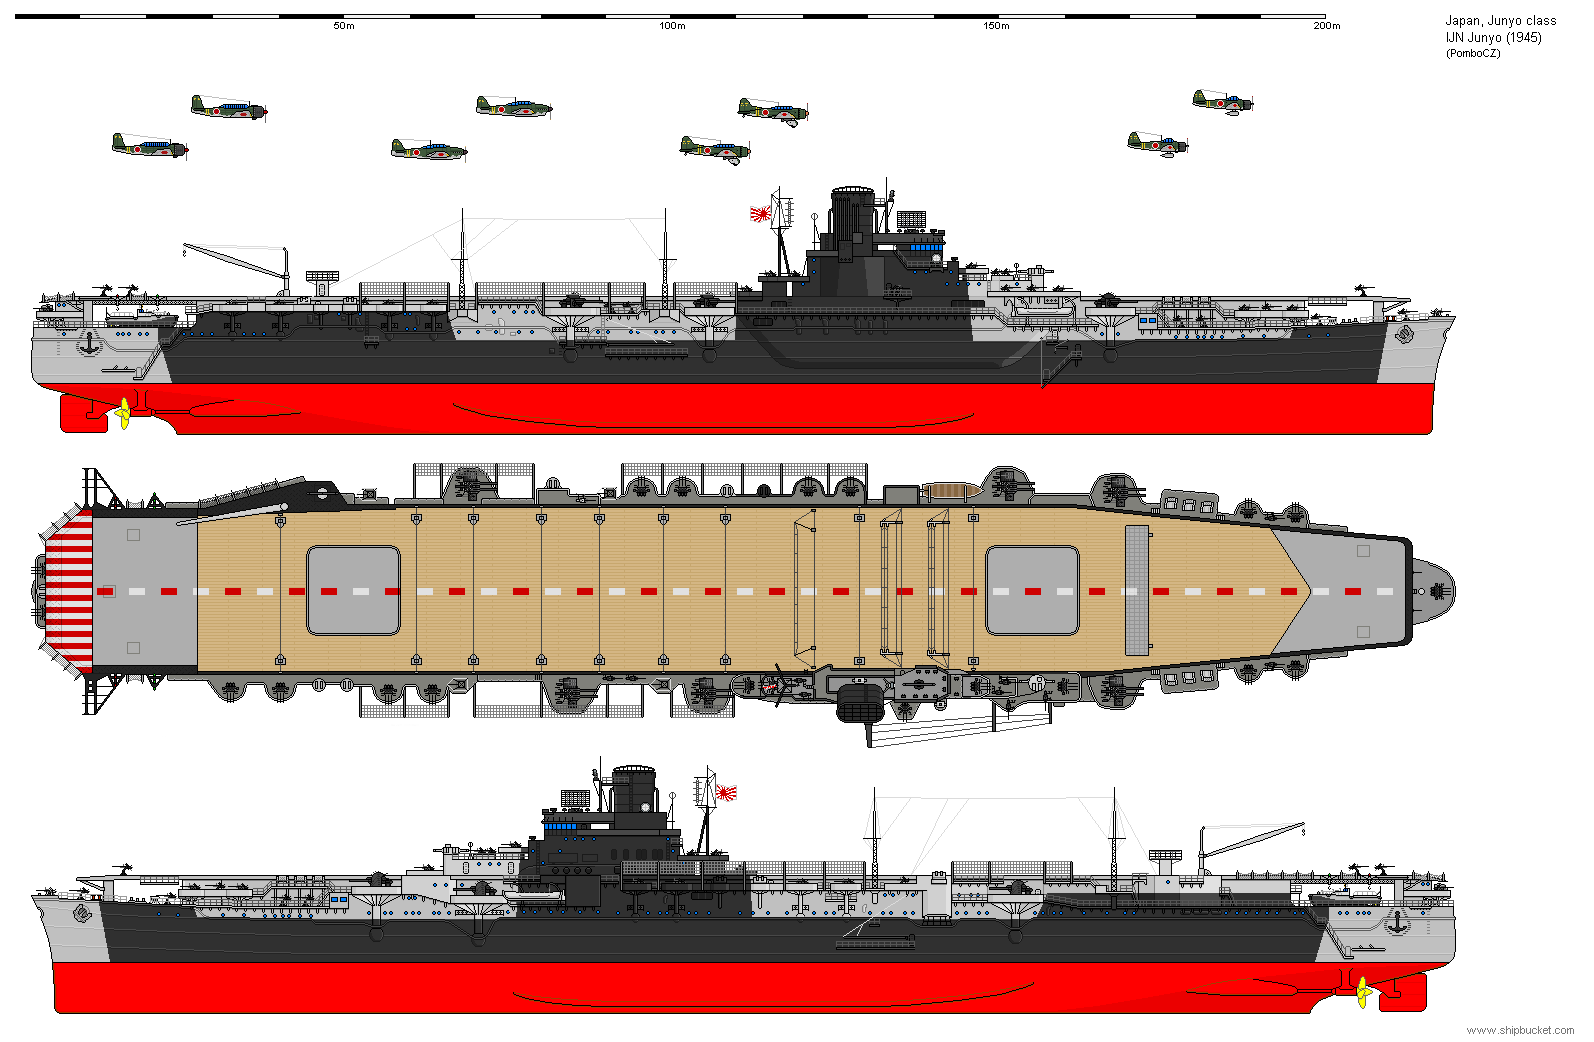
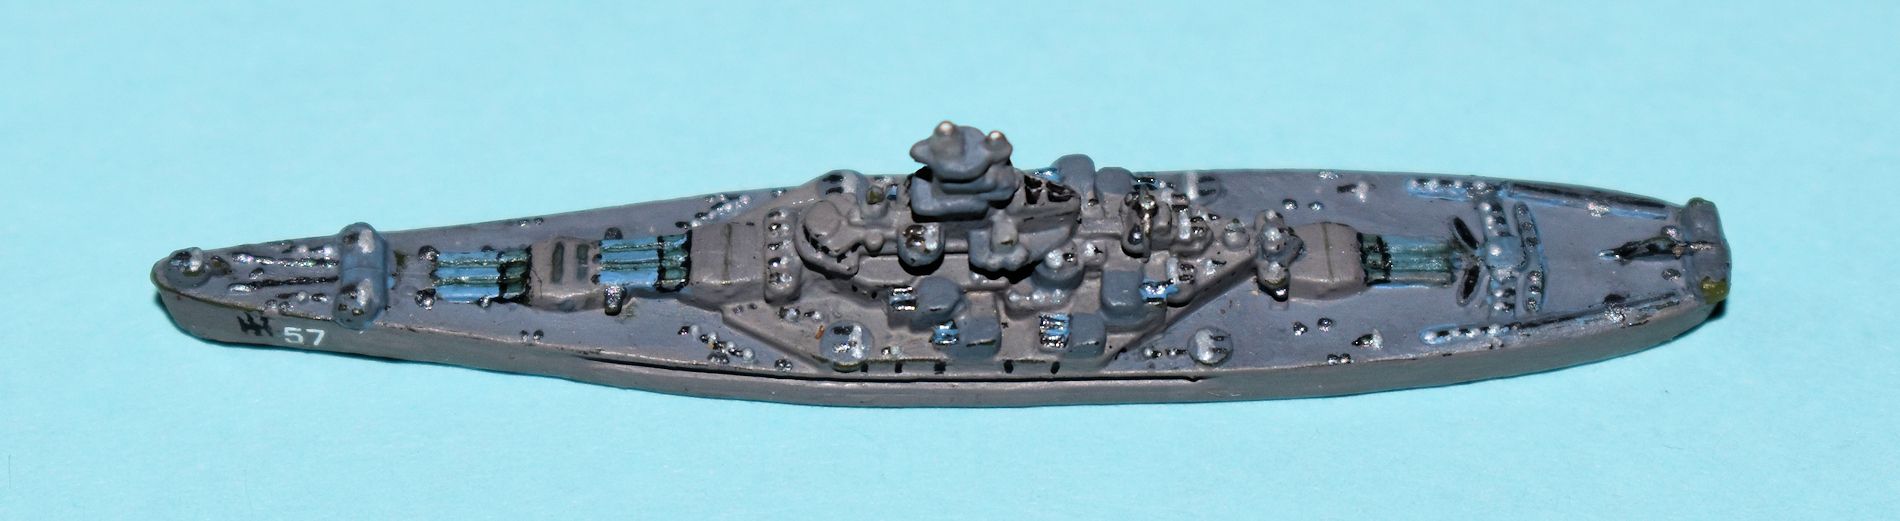
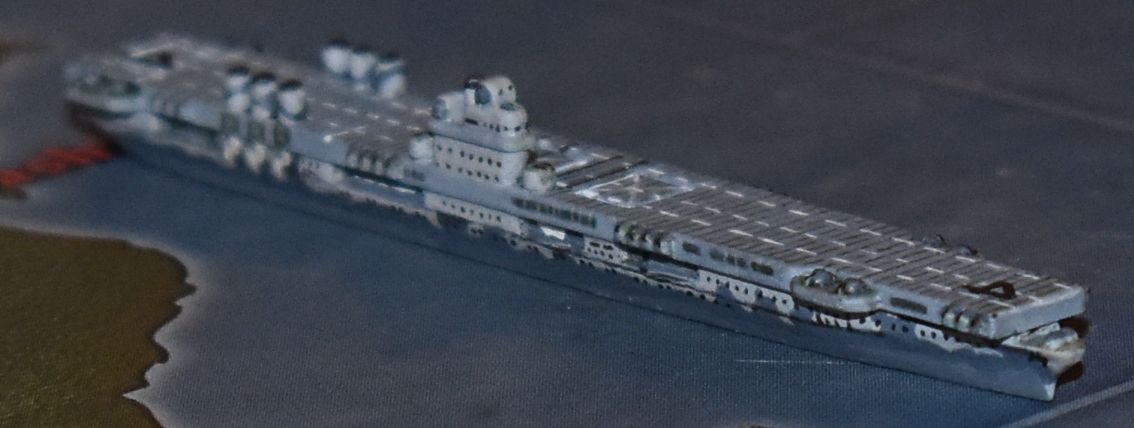
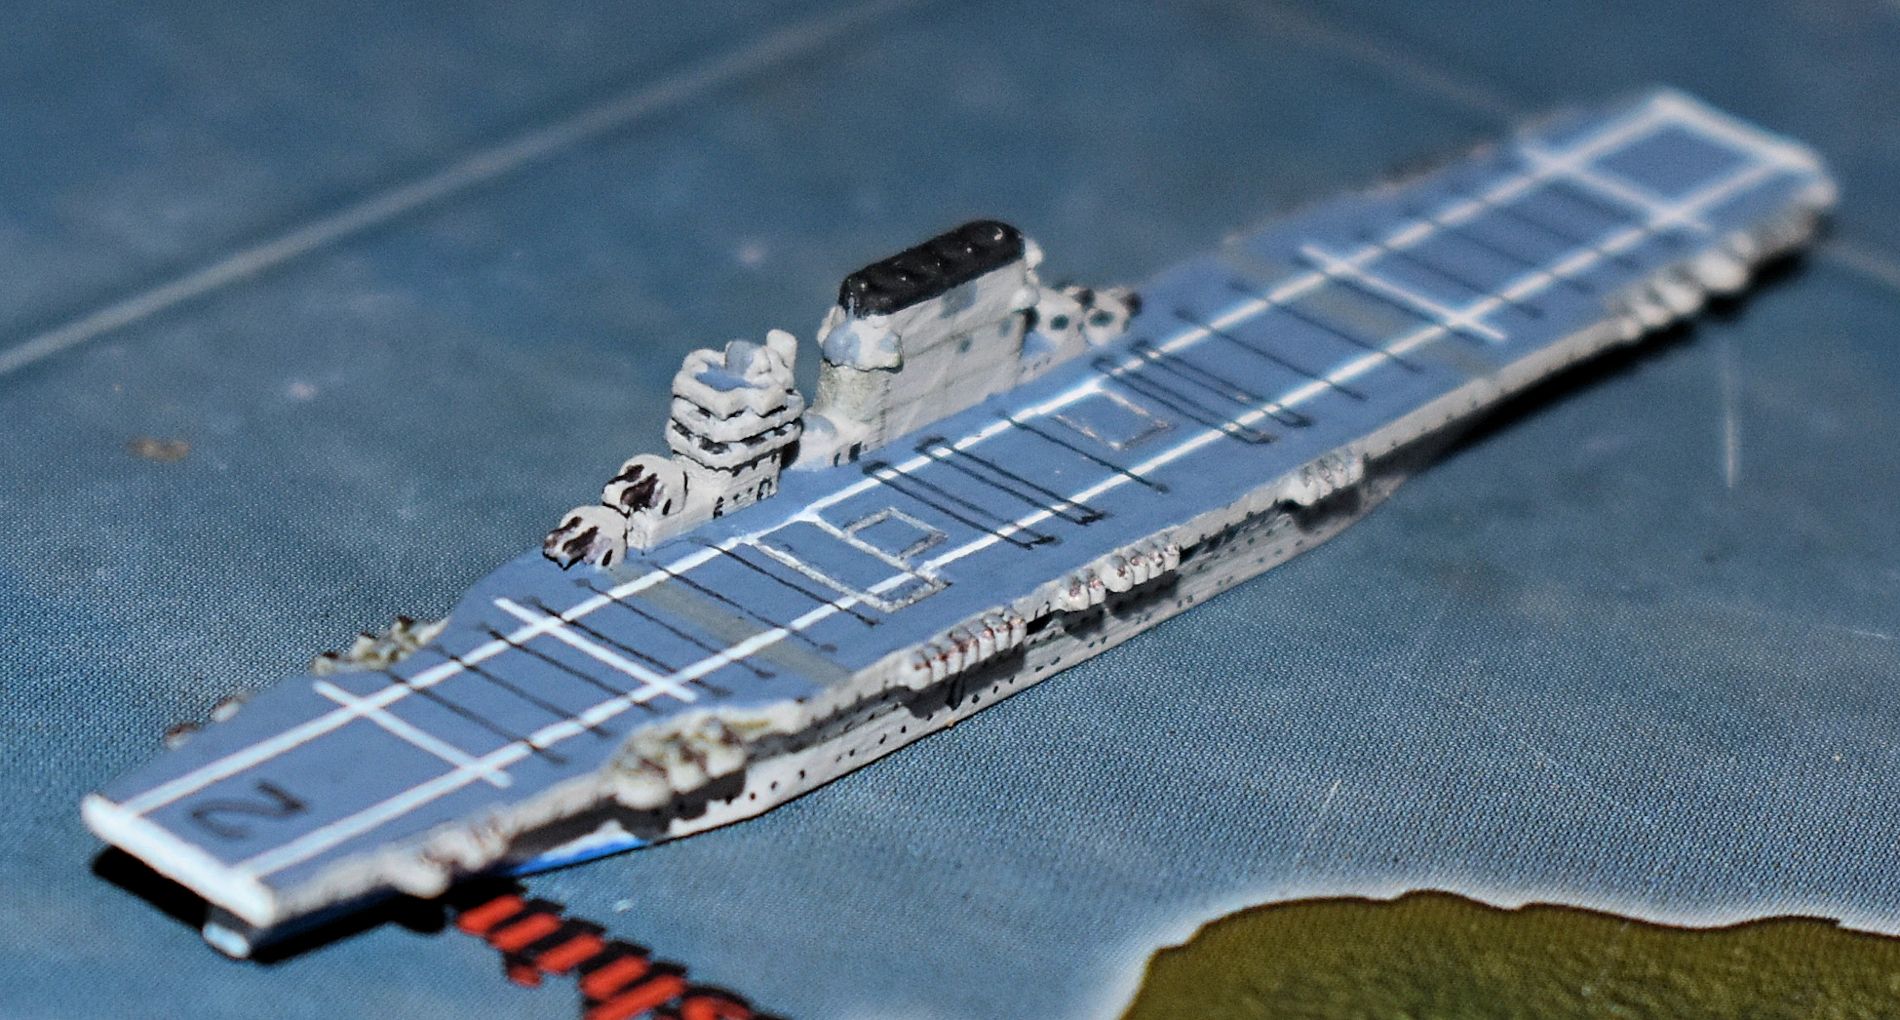
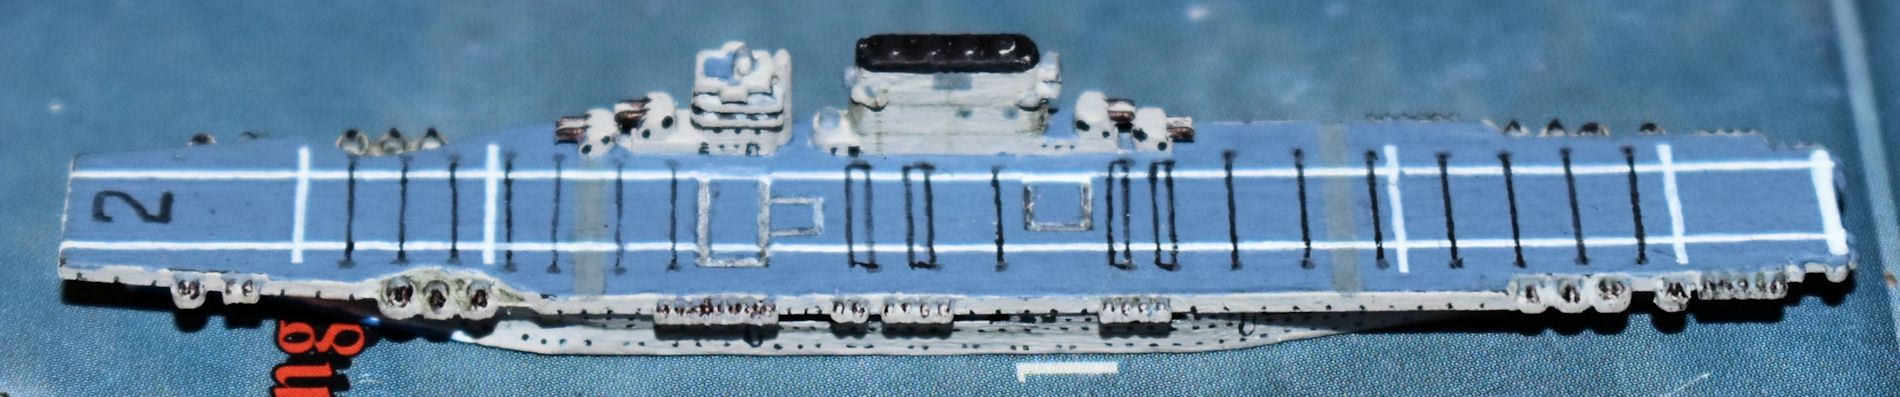
The IJN Junyo has been done for a while but I’ve just now gotten around to cropping the pictures to post. So without further ado, FOlewnik’s (a.k.a. FJO) IJN Junyo in late war livery made from a Shinano sculpt.
D
Best posts made by DMcLaren
-
RE: Custom carriers from OOB's and painted piecesposted in Customizations
-
RE: Custom carriers from OOB's and painted piecesposted in Customizations
Oh! lol, no. We use the smallest version of the Litko “Flaming Wreckage” markers. They sit well on carriers, but have to sit next to ships.

-
RE: Custom carriers from OOB's and painted piecesposted in Customizations
Thanks, guys. Glad you like the pieces. I replaced the pictures of the Vals on the bottom of page 2 with recent pictures of the finished bunch with their canopies done. We realized we’d never finished the canopies on the Oscars, so when those are done I’ll replace the picture of the Japanese fighters. We wanted to show how the camouflage schemes of the Imperial Japanese Navy went together so we put a few sorties together for a few runs down The Slot.
The Night Raiders:

The Coastal Fleet:

And my personal favorite, The Fleet of Fog:

(Can you find the 6 airplanes in the Fog Fleet?) -
RE: Custom carriers from OOB's and painted piecesposted in Customizations
@tatsu Thank you very much! Your appreciation means a lot to us. My buddy and I are fortunate enough to live just outside Detroit, Michigan where we have a few nice hobby shops. He does the ships in acrylics and I do the aircraft in enamels. The acrylics come from the local hobby shop, as do most of the brushes (Micheal’s for good brushes, as well), but I can’t find Testor’s (also under the Model Master brand) enamel locally so I get it on Amazon (and the dullcote). “Army Painter” makes some great acrylics and fine, tiny brushes that allow fine lines and details (like their “Psycho” & “Insane Detail” brushes- get both!). Its the smaller brushes that will allow you to get the fine squiggly lines for camo and smaller lines for carrier decks. I’m pretty sure they’ll ship to you: https://www.thearmypainter.com/
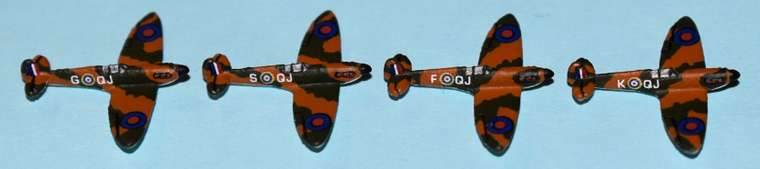
I tried masking tape when I was trying to get straight black lines on the tops of the Japanese bombers, but the pieces are too small for masking tape to work effectively. I ended up using the reflected light from my magnifying lamp on the fuselage as a straight edge guide and hand lined it with a 20/0 brush and filled it with a 3/0. I have, though, made “stencil guides” out of 3x5 cards to do things like line up the “red tape” on the Spitfire wings by cutting a small piece of card and punching the nose of the aircraft through the card and folding it onto the wings, marking where the guns go with a pencil, removing the card, cutting a small hole where I marked, and then putting that on the nose of the aircraft, dab a spot of color in the hole to be squared later, and then reversing the card on the nose for the other wing. Also helps with decal placement if you don’t have a better measuring tool.
FOlewnik has started on the US Navy while I’m working on some UK bombers and US tacticals. The GHQ destroyers and destroyer escorts that FOlewnik got at last year’s “Check Your 6!” gameday in Dayton, OH are finally getting a coat of paint and some proper hull numbers and are looking good. Testor’s makes decal sheets that I’ve been experimenting with to good effect for the underside of the Dauntless SBD and their top side control surfaces (like dive flaps and ailerons). Below are HBG’s South Dakota BB and GHQ’s DD USS Helm (NOT DE Lansing as previously thought- Helm received 11 battle stars for her World War II service in the Pacific). by FOlewnik in acrylic (I’d just put the hull numbers on and hadn’t put Microsol on them yet and they’re not dullcoted-BB needs touch-up), and my test tactical (try not to chuckle at the sound of that) in enamel with my home made decal top and bottom. I’m not happy with the inked rudder and the rest of the tacticals won’t get the full bottom and top that the test piece got. It still needs the exhaust drawn in and another engine vent on each side, and the test decal isn’t straight on one rear wing on the bottom, but I’m pleased with the potential.


-
RE: Some of my stuff.posted in Customizations
Wow… you went to the trouble to make a Fw-190D! Impressive!
-
RE: Custom carriers from OOB's and painted piecesposted in Customizations
The first New Orleans class cruiser is done (or was a few days ago but I’m just now getting around to posting). This one is the USS Minneapolis, CV-36.


The USS Minneapolis and the USS Indianapolis together for comparison:


-
RE: Custom carriers from OOB's and painted piecesposted in Customizations
Thank you AA, we appreciate the compliment! FOlewnik completed the five New Orleans class cruisers 2 weeks ago, and between work and overtime we finally got together so I could add some roundels to the scout plane wings and add hull numbers to a few non-camouflage hulls. I took some shots before I added the decals, so from left to right, The USS New Orleans, USS Astoria, USS Tuscaloosa, USS San Francisco, and USS Minneapolis.


The USS New Orleans is wearing a Bow Wave camouflage pattern, and the USS Tuscaloosa and USS San Francisco are wearing Camouflage Measure 33, Design 13D from a diagram just like the Trenton above taken from navsource. The tiny roundels went on with very little fuss (which is unusual- I must be getting the hang of it) so adding decals went quicker than I thought it would.


-
RE: Custom carriers from OOB's and painted piecesposted in Customizations
I finished a few more Hawker Hurricanes from SNAFU at Shapeways, so while FOlewnik is kept from his painting by all the overtime he’s got to put in at this time of year, I’ll share these.


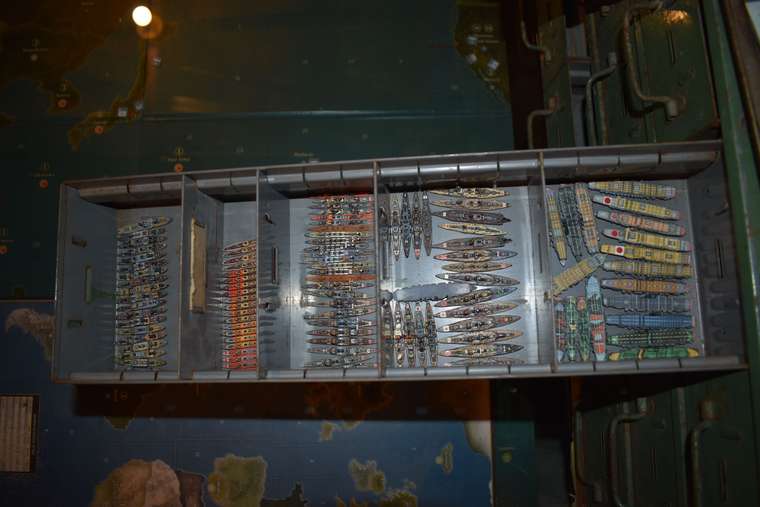
A while back someone asked about storage and I tried to describe the old metal filing cabinet piece that FOlewnik found. I grabbed a couple of shots a while ago and forgot about them, so here they are. The drawers can fit 4 piece boxes in them, with the lids, 2x2. But the painted pieces don’t get tossed together, they get separated nicely, as in the Japanese Navy drawer shown here. We’ll eventually cut some foam for each drawer but for now this is how they are.

-
RE: Custom carriers from OOB's and painted piecesposted in Customizations
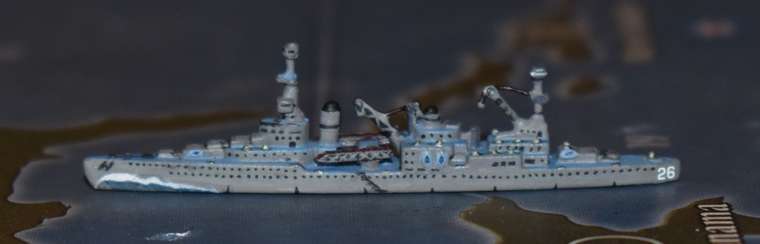
Three Northampton Class cruisers are finished now, with a possible 4th being considered. As you can see from the comparison below, the out of box (OOB for those in the know) sculpt is suspiciously close to the Northampton silhouette taken from http://www.shipcamouflage.com/ships2_9_41_plate_15.htm, so comparatively little modification work was needed to the OOB sculpt.

FOlewnik chose to paint the USS Northampton (CA-26) wearing Measure One (dark) camouflage, with a Measure Five false bow wave, as it wore when it returned to Pearl Harbor on Dec 8, 1941. There are great reference pictures for the false bow wave on navsource on the Northampton’s page: http://www.navsource.org/archives/04/026/04026.htm.


If it weren’t sunk by Japanese aerial torpedoes off Rennell Island on 30 JAN 1943, The USS Chicago (CA-29) might have worn this camo pattern, and we needed a cruiser in this pattern, so FOlewnik painted the USS Chicago wearing US Navy Camo Measure 12:


Last but not least, from a drawing prepared by the Bureau of Ships for a camouflage scheme intended for heavy cruisers of the Northampton Class, here is the USS Chester (CA-27) wearing Camouflage Measure 32, Design 9D, as seen prominently on http://www.navsource.org/archives/04/027/04027.htm.


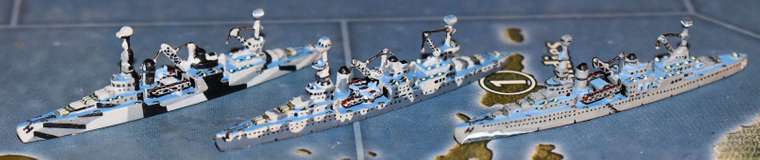
The three Northampton Class cruisers together:

And finally for comparison, the USS Chester (Northampton class), the USS Tuscaloosa (New Orleans class), and the USS Portland (Portland class):

-
RE: Custom carriers from OOB's and painted piecesposted in Customizations
@barnee Yes, the idea was to give the illusion of speed. The USS Saratoga also wore bow wave camo for a while. Shipcamouflage.com actually uses the Northampton as an example here: http://www.shipcamouflage.com/measure_5.htm

-
RE: Custom carriers from OOB's and painted piecesposted in Customizations
USS Ranger (CV-4) by FOlewnik. He actually finished this around the time of the cruiser mods for the Northamptons but I’m just now getting around to editing the pictures to post. Sculpt is from Ebard at Shapeways. Although we’ll most likely use it as a light carrier, it still has 2 magnets.


Also done are the heavy cruiser USS Boston (CA-69) and the light cruiser USS Concord (CL-10), sculpts from HBG.


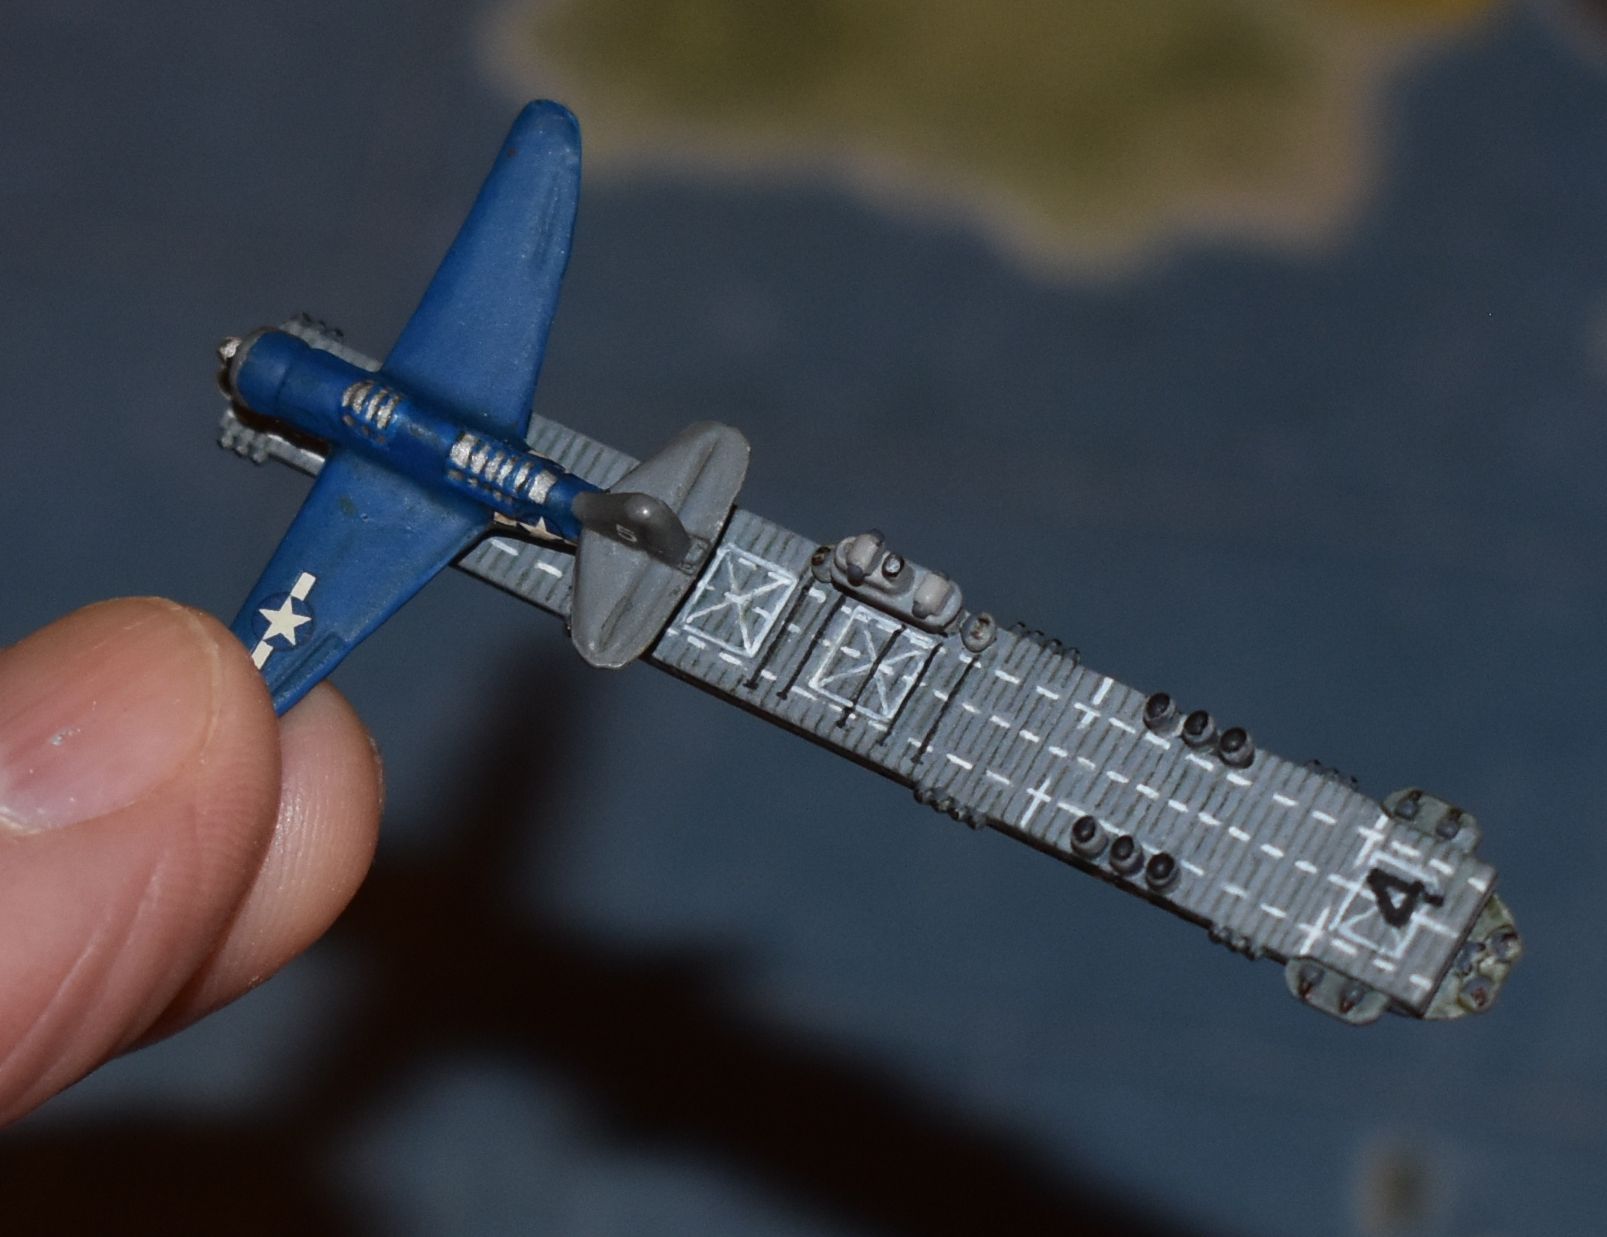
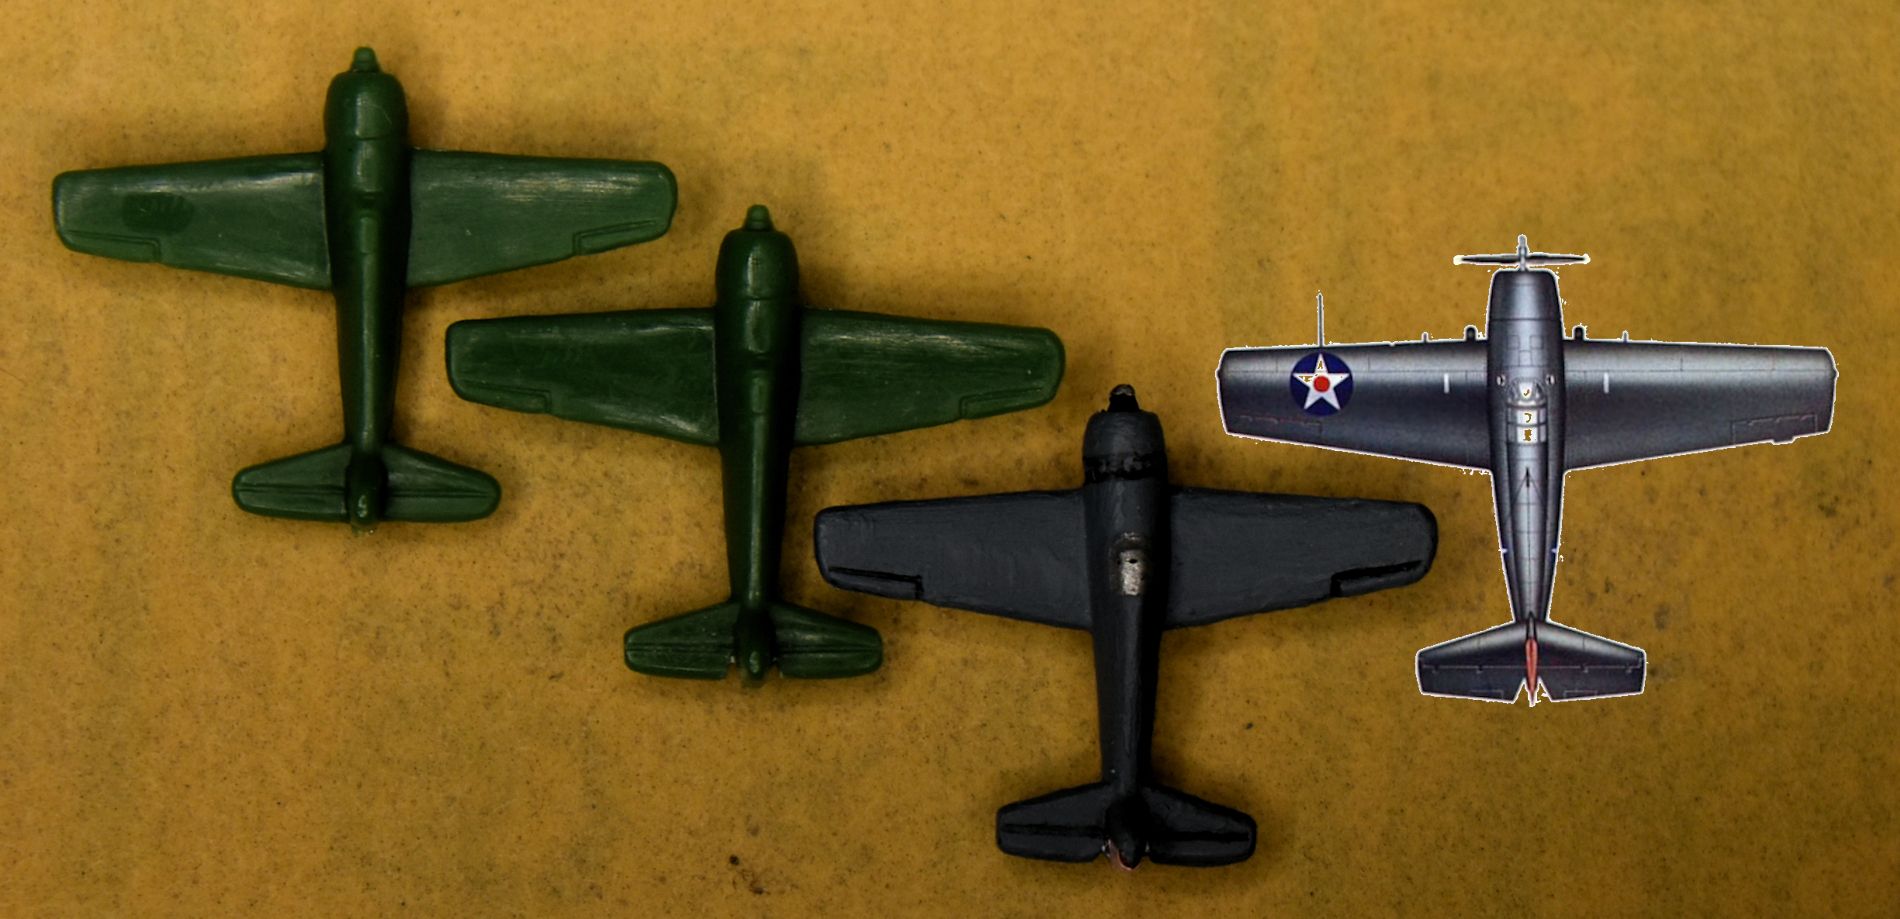
I’ve been making aircraft for the US carriers, doing SBD’s from the out of box sculpts as seen earlier in the post, and as seen above atttached by magnet to the USS Ranger, HBG’s SB2C Helldivers. But I couldn’t find F4F’s. Undaunted, I took HBG’s Hellcats, which are smaller than the out-of-box Hellcats, and shaped the tail so it looked more like the top view of an F4F I found on Wings Palette (inset below). I used 400 sandpaper and made a few passes on each round end to flatten it out, then took an X-Acto knife and cut a nick next to the rudder and ran the sandpaper through a few times to create a groove between the rudder and rear wing. The test piece became Jimmy Thatch’s F4F. Tiny decal time (LESS than one millimeter!)- I used the bottom half of each side of an unused letter “H” for the dash between the “F” and the “1” on the fuselage, and to match the pictures on Wings Palette, the “1” is actually an upper case “i”, from the decal sheet LW-100 at HBG (https://www.historicalboardgaming.com/LW-100-Decal-Sheets-White-Lettering-All-scales_p_1839.html). Now I just need FOlewnik to finish the USS Lexington so it has a place to park.
Before the cockpit is inked:

After the cockpit is inked:


-
RE: Custom carriers from OOB's and painted piecesposted in Customizations
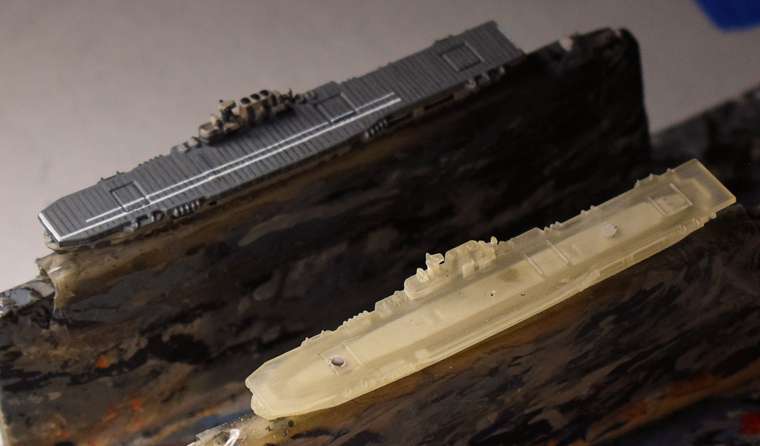
Doolittle Raid USS Hornet (CV-8) by FOlewnik almost finished in these shots. It actually is finished (arrestor cables & AA guns missing here) but I don’t yet have pictures of it. FOlewnik is using Ebard’s Yorktown class for the sculpt. The unpainted sculpt shows where the magnets have been set and leveled with putty. You can see the hollow underside has also been filled. Prior to painting and drilling the magnet holes, the island bits that look fragile are brushed with liquid Super Glue (not the gel kind). Shapeways pieces are pretty porous so the glue soaks in and helps strengthen the piece.
Close up pf the deck lines. These are done with a 10/0 brush, both the black and white. The deck AA guns haven’t been done yet.
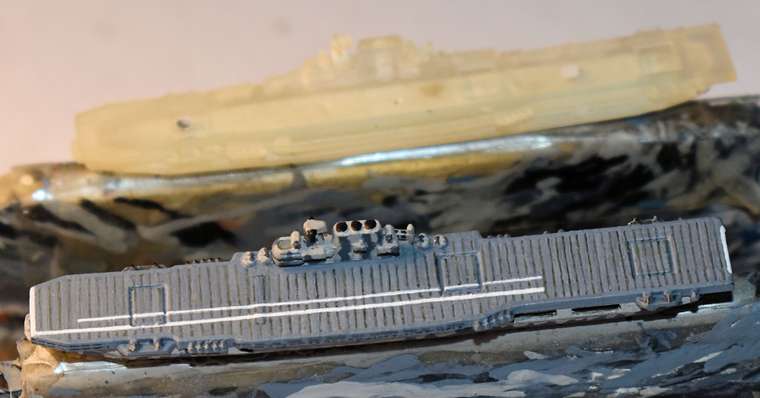
Side views:

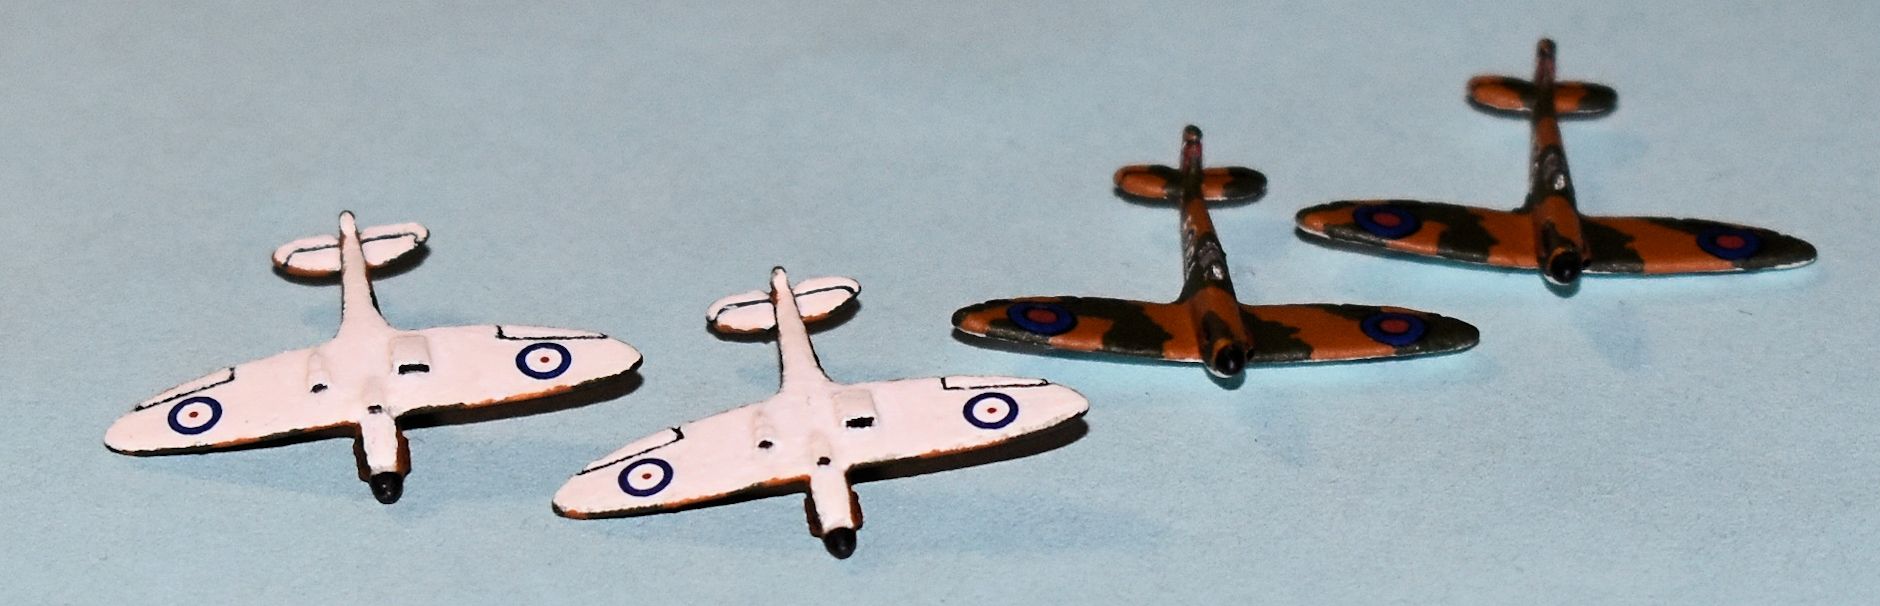
I’ve finally finished the decals on the 1/500 Spitfire MkI’s from SNAFU at Shapeways (https://www.shapeways.com/product/ZHFZWLMGK/spitfire-mk-ia-w-gear-x4-fud?optionId=66660049&li=marketplace) so I thought I’d share shots of those as well. They come with landing gear down like the Hawker Hurricanes shown earlier, but I’ve taken them off. They were used as funnels on the Japanese transports.


-
RE: Custom carriers from OOB's and painted piecesposted in Customizations
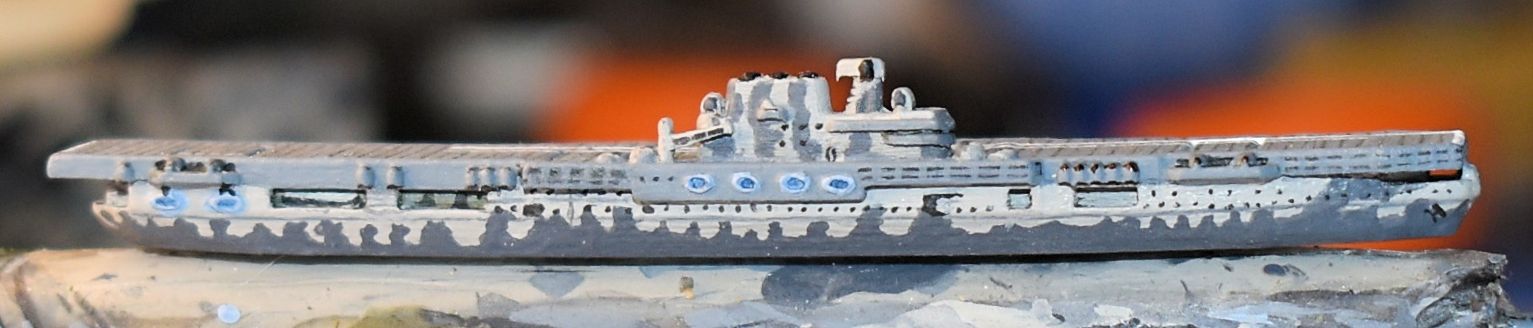
USS Lexington (CV-2) wearing a bow wave camo by FOlwenik. 3D print from Ebard at Shapeways. I think I mentioned this before, but when you work with 3D prints, they are both very porous and very fragile. To strengthen the piece, I like to add a little bit of liquid super glue (not the gel) to anything that sticks up, like the conning tower and smokestack. The liquid is immediately absorbed into the porous print, just don’t put too much on in one spot or you could lose detail. FOlewnik also filled the bottom with putty for both strength and weight. I have to admit that this is one of my favorites because of the work he put into the hull, which is nice and flat, making a good canvas. Comparison pictures taken from navsource.org.


-
RE: Try this one trick to download old files ...posted in Website/Forum Discussion
Is that why I can’t see the pictures I’ve uploaded? Will they eventually migrate here?
-
RE: WWII moviesposted in General Discussion
“Sink the Bismark!” is free on youtube and worth the watch if you haven’t seen it.
https://www.youtube.com/watch?v=9cFOAG0wfBw -
RE: Try this one trick to download old files ...posted in Website/Forum Discussion
In the Customizations section, thread titled “Custom carriers from OOB’s and painted pieces”. There should be a lot of pictures in the post and I don’t see them.
-
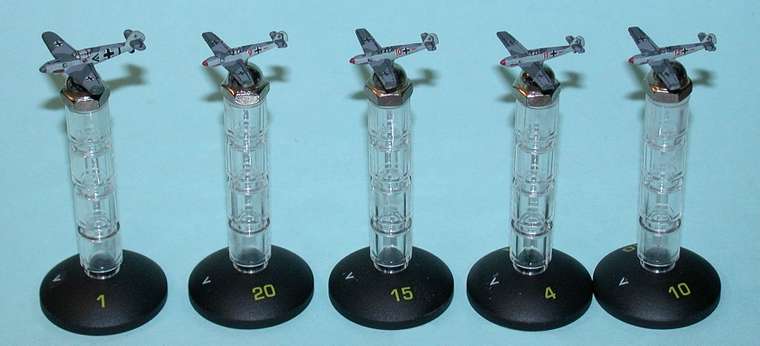
"Check Your 6!" with A&A aircraftposted in Other Axis & Allies Variants
Not a true A&A variant, but I came across a game called “Check Your 6!” while researching paint schemes for our AA aircraft and quickly realized we could use our A&A aircraft pieces (we’d already painted & added magnets to them for the aircraft carriers) for the game if we could get suitable flight stands. I googled flight stands for the game and found easy to make Lego stands made from clear round pieces and a radar dish with an acorn nut superglued on top to allow the aircraft to show flight attitude as well as altitude (banking, climbing, diving). The first picture of our test scenario doesn’t have the later added numbers and arrows on the bases to more easily determine which piece goes with each aircraft’s movement & score sheet. The second picture has the better view of the numbered stands. Pictured on the stands in the 2nd picture are, from left to right, a Historical Board Gaming Me-109E (air intake painted in) with some 109E’s from Shapeways that came too small, but some MiscMini decals made them look good. I used the yellow number sheet from I-94 and the tank insignia for the direction arrow. I bought a 4ft x 6ft hex map with 1.5 inch hexes from HotzMats and it was game on. White pipe cleaners represent airftame damage and black represent engine damage. We played a game over the Thanksgiving holiday weekend and we all had a lot of fun.

-
RE: 20 Years of Axis & Allies .orgposted in Welcome
20 years? Wow… too cool! I’ll drink to that, and toast to another 20 years of A&A forums!